ADA Elevator Requirements: Signage, Dimensions & More

Elevator ADA Requirements: Signage, Dimensions, Handrails, and More

By David Murphy | May 24, 2025

If you don’t have a disability, taking the elevator is often a matter of convenience. It’s an easy way to move between floors or transport heavy items. For many people with disabilities, however, elevators are much more than a convenience. They are essential for accessibility, allowing individuals with mobility impairments to navigate buildings safely and independently.

That’s why the Americans with Disabilities Act (ADA) establishes specific requirements for elevator design, including dimensions, signage, handrails, controls, and emergency communication systems. These guidelines help create buildings that are not only compliant but also safe, accessible, and welcoming to everyone. Failing to meet ADA standards can lead to fines, lawsuits, and barriers that prevent people from fully accessing your facility.

Whether you’re involved in designing a new building or renovating an existing one, understanding ADA elevator requirements is essential. This guide explains the key standards you need to know to help create an accessible, code-compliant building.

Essential ADA Elevator Requirements

Designing an ADA-compliant elevator requires careful planning and attention to detail. Every requirement exists to ensure people of all abilities can use the elevator safely, comfortably, and independently.

1. Follow the Required ADA Elevator Dimensions

One of the first considerations when designing an accessible elevator is making sure the cab provides enough space for wheelchair users and other mobility devices.

ADA guidelines state that elevators must have a clear floor space of at least 51 inches deep and 68 inches wide for side-opening doors, or 80 inches wide for center-opening doors. The elevator door itself must provide a minimum clear opening of 36 inches.

When designing or renovating an elevator, compare the interior cab dimensions against ADA minimum requirements before construction begins.

While the ADA does not specifically require enough room for a complete 360-degree wheelchair turn, selecting a larger cab whenever possible can improve accessibility, especially in buildings with high foot traffic. If space is limited, widening doorways or adjusting the surrounding layout may help you achieve the required clearances.

2. Install Proper Handrails

Although handrails are not required inside every elevator cab, they can provide valuable support and stability for many users.

If handrails are installed, they should comply with ADA recommendations by:

  • Mounting between 34 and 38 inches above the finished floor
  • Remaining continuous along at least one wall
  • Providing approximately 1½ inches of clearance from the wall
  • Offering an easy-to-grip surface

Rounded or oval handrails generally provide the most comfortable grip, while materials such as stainless steel or powder-coated metal offer long-lasting durability.

Handrails should never interfere with elevator controls or signage, and they should be securely anchored to support users who rely on them for balance.

3. Design Accessible Elevator Control Panels

Elevator controls should be easy for everyone to locate, read, and operate.

Emergency control buttons must be positioned no higher than 35 inches above the finished floor so they can be reached from a seated position. Other operable buttons should be mounted within the ADA accessible reach range of 15 to 48 inches above the floor.

Buttons should also:

  • Measure at least ¾ inch in diameter
  • Include raised tactile characters
  • Include Grade 2 Braille
  • Illuminate when pressed

Using large, high-contrast buttons makes the controls easier to identify for individuals with low vision while improving usability for everyone.

Whenever possible, ensure controls remain easily accessible regardless of where a person is positioned inside the elevator. Emergency buttons should also be clearly identified and easy to reach.

4. Adjust Door Operation and Timing for Accessibility

Elevator doors should remain open long enough for people using wheelchairs, walkers, canes, or other mobility aids to enter and exit safely.

ADA guidelines require elevator doors to remain fully open for a minimum of three seconds. The doors must also automatically reopen if an obstruction is detected.

Although three seconds satisfies the minimum requirement, many facilities choose to keep doors open for five to seven seconds to better accommodate all users.

Motion sensors and pressure-sensitive door edges can provide additional protection by detecting people entering the elevator late and preventing the doors from closing too soon.

If appropriate, post clear instructions explaining how users can hold the doors open.

5. Improve Audio and Visual Accessibility

ADA-compliant elevators should communicate important information through both audible announcements and visual indicators.

This includes:

  • Audible floor announcements
  • Audible direction-of-travel notifications
  • Visual floor indicators
  • Visual direction indicators
  • Door opening and closing notifications

Voice announcement systems should clearly identify each floor while indicating whether the elevator is traveling up or down.

Bright, backlit displays located inside the elevator and above the doors improve visibility for individuals with hearing impairments or anyone navigating a noisy environment.

Facilities serving individuals with hearing loss may also benefit from installing visual emergency notification systems.

6. Ensure Emergency Communication Is Accessible

Every ADA-compliant elevator must include a two-way emergency communication system.

Whether the system uses a hands-free telephone or an intercom, emergency controls should be mounted no higher than 48 inches above the finished floor.

The communication system should also be usable by individuals with hearing or speech disabilities.

Many modern emergency systems include:

  • Text-based communication
  • TTY compatibility
  • IP-based emergency messaging
  • Braille operating instructions
  • Battery backup to remain operational during power outages

Providing multiple communication methods helps ensure every occupant can request assistance during an emergency.

7. Follow ADA Elevator Signage Requirements

Proper signage is an important part of elevator accessibility.

ADA requirements call for permanent signs that are easy to locate, read, and understand.

Required signage typically includes:

  • Raised tactile characters
  • Grade 2 Braille
  • Floor identification signs
  • Directional signs where necessary

Floor identification signs should be installed consistently on the elevator door jamb so users can easily locate them by touch.

When selecting a typeface, use a simple sans-serif font that meets ADA character requirements. Decorative, script, italic, or highly stylized fonts should be avoided because they reduce readability.

High-contrast colors and non-glare finishes also improve visibility while helping signage comply with ADA standards.

Accessibility Starts with the Details

For contractors, architects, facility managers, and sign professionals, ADA compliance is more than a building requirement. It reflects a commitment to creating spaces that everyone can use safely and independently.

From elevator dimensions and control panels to handrails and signage, every detail contributes to a more accessible building.

At Erie Custom Signs, we manufacture custom ADA-compliant signage designed to meet current accessibility standards while complementing your project’s design.

We offer:

  • Custom ADA signage solutions
  • Fast turnaround times
  • 100% ADA-compliant fabrication
  • Multiple durable material options
  • Responsive customer support

Whether you’re outfitting a new construction project or updating an existing building, our team can help you specify ADA-compliant signage with confidence.

Explore our custom ADA signage solutions and make accessibility part of every project.

ADA Fire Extinguisher Sign Requirements: Compliance Made Simple

ADA Fire Extinguisher Sign Requirements: Compliance Made Simple

By David Murphy | July 21, 2025
Fire incidents are among the most costly and disruptive emergencies in commercial facilities. When a fire occurs, occupants need to locate safety equipment quickly, and clear signage plays an important role in that process.
According to the U.S. Fire Administration, the United States reported 110,000 nonresidential building fires in 2023, resulting in injuries and millions of dollars in property damage. That’s why ADA-compliant fire extinguisher signage is more than a code requirement. It helps make emergency equipment easier to locate for everyone, including employees and visitors with visual impairments.
For facilities such as offices, healthcare environments, schools, and government buildings, proper fire extinguisher signs support both accessibility and safety initiatives. They can also help reduce the risk of costly compliance issues, including ADA-related complaints and legal action.

6 ADA Requirements for Fire Extinguisher Signage

Meeting ADA fire extinguisher sign requirements helps create a safer, more accessible environment for building occupants. Here are six key guidelines to follow.

1. Position Signage at the Correct Height

ADA guidelines require tactile signs to be mounted so the baseline of the lowest raised character is at least 48 inches above the finished floor, and the baseline of the highest raised character is no more than 60 inches above the floor.
This placement helps ensure signs can be located and read by people of varying heights and mobility levels.

2. Include Tactile Characters and Grade 2 Braille

ADA fire extinguisher signs should include raised tactile characters and Grade 2 Braille placed directly below the corresponding text.
These features allow individuals with visual impairments to identify the location and purpose of the sign by touch. Braille dots should be rounded or domed to comply with ADA readability standards.

3. Ensure Strong Visual Contrast and Non-Glare Finishes

Signs should be easy to distinguish from their background.
Look for:
  • High contrast between characters and the background
  • Light-on-dark or dark-on-light color combinations
  • Non-glare finishes such as matte or eggshell surfaces

4. Use Universally Recognized Pictograms

Pictograms provide a quick visual reference and can improve recognition during an emergency.
When pictograms are used, ADA standards require:
  • A designated pictogram field at least 6 inches high
  • The pictogram positioned above the tactile text
  • Accompanying text descriptors and Braille where applicable
A standardized fire extinguisher symbol helps occupants quickly identify the purpose of the sign.

5. Use Clear, Sans-Serif Fonts in Uppercase

Raised tactile text should use simple, easy-to-read lettering.
Recommended font styles include:
  • Helvetica
  • Arial
  • Other ADA-compliant sans-serif typefaces

6. Mount Signs in Consistent, Logical Locations

Consistency matters, particularly during emergencies.
Fire extinguisher identification signs are commonly mounted adjacent to the extinguisher cabinet or bracket location so occupants can quickly recognize and locate the equipment.
Maintaining consistent placement throughout a facility can improve wayfinding and simplify future inspections.

How to Ensure Your Facility’s Signage Meets ADA Fire Safety Standards

Understanding ADA requirements is only part of the process. Ongoing maintenance and regular reviews help keep your facility compliant over time.

1. Conduct a Facility-Wide ADA Signage Audit

Start with a comprehensive walkthrough of your building.
Review:
  • Fire extinguisher locations
  • Existing signage
  • Mounting heights
  • Braille and tactile features
  • Visual contrast requirements
Using an ADA compliance checklist can help identify issues before they become safety concerns or compliance violations.

2. Choose Durable, High-Contrast Signage Materials

Material selection affects both performance and compliance.
Popular options include:
  • Acrylic signage
  • Photopolymer signage
  • Matte-finish materials designed to reduce glare
In demanding environments, durable materials can provide long-term readability while maintaining a professional appearance.

3. Standardize Sign Design Across Locations

Consistency helps occupants identify signage more easily and simplifies compliance reviews.
Standardize:
  • Fonts
  • Colors
  • Braille placement
  • Pictogram sizing
  • Sign layouts
Working with a single ADA signage supplier often helps maintain consistency across multiple buildings or campuses.

4. Train Staff on Proper ADA Signage Placement

Even compliant signs can create issues if they are installed incorrectly.
Facilities and maintenance teams should understand:
  • Mounting height requirements
  • Tactile sign placement
  • Braille specifications
  • ADA signage updates
Regular training helps prevent avoidable compliance mistakes.

5. Partner with ADA-Compliant Signage Experts

ADA signage requirements can be complex, especially for organizations managing multiple facilities.
Working with experienced accessibility signage providers can help reduce uncertainty and ensure signs meet current ADA and ANSI standards.
At Erie Custom Signs, we manufacture ADA- and ANSI-compliant signs that meet tactile, Braille, and pictogram requirements while providing customization options for facility branding and design standards.

6. Review and Update Signage Regularly

Accessibility compliance is not a one-time project.
Schedule periodic reviews, especially:
  • After renovations
  • Following facility expansions
  • When room layouts change
  • When updated code requirements are adopted
Routine inspections can help identify signage that needs replacement, relocation, or updating.

Quick ADA Fire Extinguisher Sign Checklist

Use this checklist to evaluate your facility’s fire extinguisher signage:
Tactile raised characters included
Grade 2 Braille included
Mounted between 48 and 60 inches from the floor
Strong visual contrast provided
Non-glare finish used
ADA-compliant pictogram included (when applicable)
Consistent sign placement throughout the facility
Signs inspected regularly for continued compliance

FAQ: ADA Fire Extinguisher Sign Requirements

Are fire extinguisher signs required to have Braille?

When a fire extinguisher sign is designed as a tactile identification sign subject to ADA requirements, it should include Grade 2 Braille and raised characters to provide accessibility for individuals with visual impairments.

What height should ADA fire extinguisher signs be mounted?

ADA tactile signage is generally mounted so the lowest raised character is at least 48 inches above the finished floor and the highest raised character is no more than 60 inches above the floor.

Do fire extinguisher signs require tactile lettering?

ADA-compliant identification signs typically require raised tactile lettering along with Braille to support accessibility.

Where should fire extinguisher signs be installed?

They are commonly installed adjacent to the extinguisher cabinet or bracket location in a consistent position throughout the facility.

Smart Signage Means Safer Spaces

Every fire extinguisher sign contributes to a safer and more accessible environment. For contractors, architects, sign companies, facility managers, and property owners, understanding ADA fire extinguisher sign requirements helps support both compliance and emergency preparedness.
Staying current with ADA and ANSI standards, conducting routine signage reviews, and working with experienced accessibility signage providers can help reduce risk while improving safety throughout your facility.
If you’re evaluating a new project or updating an existing building, Erie Custom Signs can help simplify the process with custom ADA signage designed to meet current accessibility standards and project requirements.

ADA Sign Care: How to Clean Acrylic Signs

ADA Sign Care: How to Clean Acrylic Signs

By Mike Shabluk | May 7, 2024
If your building has ADA signs, there’s a good chance they’re made from acrylic. It’s one of the most affordable, durable, and low-maintenance materials used for interior ADA signage. Even so, acrylic signs still require routine care to maintain their appearance and readability.
Whether you’ve recently installed new signs or you’ve noticed existing displays collecting fingerprints, dust, and scuff marks, knowing how to clean acrylic signs properly can help extend their lifespan and keep them looking professional.
Before discussing the cleaning process itself, it’s worth understanding why ADA sign maintenance matters in the first place.

Why ADA Sign Care & Maintenance Matters

Many organizations assume their work is finished once they order and mount ADA signage. In reality, signage is no different than any other feature in a facility. It needs routine maintenance to continue serving its intended purpose.
A small amount of dirt or a few scratches may seem insignificant, but neglected signs can create several problems over time.

Signs in Poor Condition Can Be Difficult to Read

When signs accumulate dust, smudges, dirt, and scuff marks, they become harder to read. For people with limited vision, even minor visibility issues can impact their ability to navigate a facility effectively.
The purpose of ADA signs is to provide accessible information. Keeping them, clean helps ensure they continue to serve that function.

Lack of Sign Maintenance Can Create a Negative Impression

The condition of your facility influences how visitors perceive your organization, and signage is part of that experience.
A FedEx Office® survey found that 68% of consumers believe signage reflects the quality of a business’s products or services. Worn, stained, or neglected signs can leave an unfavorable impression that may affect how people view your organization.

Sign Maintenance Helps Protect Your Investment

Even budget-friendly ADA signage represents an investment. Most organizations want signage that performs well for years, not months.
Regular cleaning helps prevent premature wear, reducing the likelihood that signs will need to be replaced sooner than expected.

Well-Maintained Facilities Support Employee Morale

Your employees spend more time in your facility than anyone else. When signs and other building features appear neglected, it can suggest a lack of attention to the workplace environment.
While signage alone won’t determine employee satisfaction, maintaining a clean, professional facility contributes to a more positive atmosphere.

How to Clean Acrylic Signs Properly

The good news is that cleaning acrylic ADA signs is relatively simple. While facilities with dozens of signs may require a little extra time, the process itself is straightforward.
Proper acrylic sign care comes down to four key factors:
  • Using the right tools
  • Following the correct cleaning process
  • Cleaning signs regularly
  • Avoiding materials and practices that can damage acrylic
Note: The guidance below applies to interior acrylic signage. Exterior signs may require different cleaning methods depending on their size, location, and construction.

What Tools You Need

Before getting started, gather the appropriate cleaning supplies. Most of these items are commonly available, though some facilities may choose to keep specialty products on hand for deeper cleaning.
Recommended tools include:
  • Soft cloth – A microfiber cloth or gentle sponge works best for cleaning and drying acrylic surfaces.
  • Mild soap or detergent – Use a non-citrus dish soap when water alone won’t remove dirt and grime.
  • Lukewarm water – Clean, room-temperature water is ideal.
  • Cotton swabs – Helpful for grooves, edges, and spaces around tactile characters.
  • Compressed air – Useful for removing dust from engraved areas and hard-to-reach spots.
  • Gloves (optional) – Can help protect your hands during cleaning.

What Steps to Follow

Once you have the proper supplies, you’re ready to begin.

1. Remove Surface Debris

Use compressed air to clear dust and loose debris from engraved areas, tactile lettering, and other detailed sections of the sign.

2. Wash the Sign

Dampen a microfiber cloth with a mixture of mild soap and lukewarm water. Gently wipe the sign using circular motions to remove fingerprints, dirt, grease, and buildup.

3. Clean Detailed Areas

If dirt remains in grooves or around tactile characters, carefully clean those areas with a cotton swab.

4. Blot the Sign Dry

Using a dry microfiber cloth or the dry side of your cleaning cloth, gently blot the sign until all moisture is removed.
Avoid aggressive rubbing, which can leave streaks or create scratches on the acrylic surface.

How Often to Clean Signs

For most facilities, cleaning acrylic ADA signs every three months is sufficient.
However, signs located in high-traffic areas may require more frequent cleaning because they are exposed to additional fingerprints, smudges, and handling.
As a general rule, reviewing signage condition as part of a quarterly facility maintenance schedule is usually enough to keep displays looking their best.

What Practices to Avoid

Knowing how to clean acrylic signs is only half the equation. It’s equally important to avoid practices that can damage the material. 
Here are some common mistakes to avoid:
  • Don’t use paper towels, steel wool, abrasive brushes, or other rough cleaning materials.
  • Don’t use cleaners that contain ammonia, citrus, or other harsh chemicals.
  • Don’t apply glass cleaners, degreasers, or kitchen cleaning products to acrylic surfaces.
  • Don’t scrub aggressively. Use gentle circular motions instead.
  • Don’t leave moisture on the sign after cleaning. Always dry the surface completely.
  • Don’t wipe acrylic signs with a dry cloth, as trapped particles can scratch the surface.
  • Don’t apply polish without testing it first. Some products can leave a glossy finish that may not meet ADA requirements.
Although acrylic is highly durable, it still requires careful handling. Using soft materials and mild cleaning products helps preserve the appearance and performance of your signage for years to come.

Takeaway

Installing ADA signs is only the first step. Ongoing maintenance helps keep signage readable, professional, and accessible for building occupants and visitors.
Fortunately, acrylic ADA signs require very little upkeep. With the right cleaning supplies, proper techniques, and a simple maintenance schedule, you can keep your signage in excellent condition while protecting your investment.
If you have questions about acrylic ADA signage or need guidance on selecting the right signs for your project, the team at Erie Custom Signs is always available to help.

ADA Hotel Room Signage Requirements

ADA Hotel Room Signage Requirements

As travel continues to increase, more people are taking trips to visit family, attend events, or enjoy a well-earned vacation. As a result, hotels and other lodging facilities continue to welcome guests from a wide range of backgrounds and abilities.

For businesses in the hospitality industry, and the sign shops that serve them, having the proper signage in place is an important part of creating an accessible guest experience. That starts with understanding ADA hotel room signage requirements.

At first glance, hotel room signs may seem fairly straightforward. However, there are several requirements that determine whether a sign meets ADA standards. Whether you’re ordering hotel room signs for your own property or sourcing them for a client, it’s important to understand what makes them compliant.

The Importance of Following ADA Hotel Room Signage Requirements

The most obvious reason for following ADA hotel room signage requirements is compliance with the Americans with Disabilities Act.

Hotels, motels, inns, and other places of lodging are required to comply with the ADA. The law even includes a checklist for new lodging facilities, with an entire section dedicated to interior signage.

When hotel room signs are missing required features, mounted incorrectly, or become difficult to read because of wear and tear, they may no longer meet ADA requirements. Like any other business, hotels that fail to comply with the ADA can face significant fines.

Financial penalties aren’t the only concern.

If a hotel’s signage prevents guests with disabilities from accessing or navigating the facility independently, management could also face legal action.

Beyond compliance, proper signage helps create a better experience for every guest. The ADA was created to ensure people with disabilities have the same rights and opportunities as everyone else.

Installing compliant hotel room signage helps support that goal by:

  • Allowing guests with visual impairments to locate and identify rooms more easily
  • Demonstrating a commitment to accessibility and equal access for every guest

There is also a practical financial benefit.

Replacing non-compliant signage after installation can be expensive. Investing in properly designed, high-quality ADA hotel room signs the first time helps avoid unnecessary replacement costs while providing durable signage that can last for years.

What Characteristics Are Required for Hotel Room Number Signs?

Understanding why ADA hotel room signage requirements matter is only the first step. The next is knowing what features these signs must include.

Hotels use many different types of signage throughout their facilities, but this guide focuses specifically on hotel room number signs.

Several elements contribute to ADA compliance.

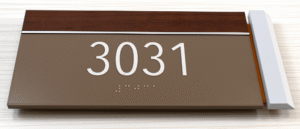
1. Raised Characters and Braille

Hotel room number signs identify permanent rooms, which means they must be designed to be read by touch.

According to the 2010 ADA Standards for Accessible Design, a sign may include both visual and tactile characters on one display, or the information may be divided between two separate signs. In most hotels, a single sign that combines both visual and tactile elements is the preferred option.

Raised characters must meet several requirements related to:

  • Depth
  • Case
  • Style
  • Character proportions
  • Height
  • Stroke thickness
  • Character spacing
  • Line spacing

The accompanying Braille must also comply with specific requirements covering:

  • Grade
  • Dimensions and capitalization
  • Position

2. Contrast Between Characters and Background

Like other signs that identify permanent rooms or spaces, ADA hotel room signs must provide a high level of contrast between the characters and the background.

Strong contrast makes it easier for guests with low vision to identify room numbers and confirm they have reached the correct location.

Does the ADA require a specific contrast percentage or color combination?

No.

Although many sign professionals recommend approximately 70% contrast, the ADA does not specify an exact percentage.

Compliance can be achieved using either light characters on a dark background or dark characters on a light background, provided the text remains easy to distinguish.

3. Non-Glare Finish

ADA hotel room signs must also feature a non-glare finish on both the background and the characters.

Reducing glare makes signage easier to read under various lighting conditions and improves accessibility for guests with visual impairments.

The ADA does not specify a particular finish. However, matte and eggshell finishes are commonly used because they minimize reflections while maintaining readability.

Bonus: Pictograms

Pictograms are not required for hotel room number signs, but many hotels choose to include them.

For example, some facilities add a small no-smoking symbol or other room-specific graphic.

Because these pictograms are optional, they are not required to include tactile elements, Braille, or a designated field size. Even so, they should remain clear, simple, and easy for guests to understand.

What to Keep in Mind for Proper Hotel Room Sign Installation

The sign itself is only part of ADA compliance. Proper installation is equally important.

Even a fully compliant hotel room sign can become difficult to use if it is mounted in the wrong location or at the wrong height.

When installing hotel room number signs, remember to:

  • Mount signs between 48 and 60 inches above the finished floor
  • Avoid mounting signs directly on the door whenever possible
  • Provide adequate clearance so guests can safely approach and read the sign

Correct placement allows guests, especially those with visual impairments, to locate and read room identification signs more easily.

Takeaway

Whether you manage a hotel or regularly work with hospitality clients, understanding ADA hotel room signage requirements is essential.

Fortunately, you don’t have to memorize every detail of the ADA Standards for Accessible Design. Working with an experienced ADA sign manufacturer helps ensure the hotel room signs you receive meet current accessibility requirements while maintaining a professional appearance.

If you’re looking for high-quality ADA-compliant hotel signage, Erie Custom Signs offers durable, customizable solutions designed to help hotels create welcoming, accessible environments for every guest.

Americans with Disabilities Act Overview: What It Covers and More

Americans with Disabilities Act Overview: What It Covers and More

July 26 marks the anniversary of the Americans with Disabilities Act (ADA) becoming law. Since its passage, the ADA has played a major role in expanding access, opportunity, and inclusion for people with disabilities across the United States.
For businesses, facility managers, architects, contractors, and organizations that serve the public, the ADA is more than an important civil rights law. It’s accessibility standards that affect how facilities are designed, built, renovated, and operated.
This Americans with Disabilities Act overview explains what the ADA is, who it protects, what it covers, and why understanding its requirements remains important today.

What Is the Americans with Disabilities Act (ADA)?

The Americans with Disabilities Act (ADA) is a federal civil rights law that prohibits discrimination against individuals with disabilities.
The ADA’s protections extend across many areas of public life, including employment, transportation, government services, telecommunications, and public accommodations. The law is to ensure that people with disabilities have equal access to opportunities, services, and facilities.

What Is the Purpose of the ADA?

The purpose of the ADA is to ensure that people with disabilities have the same rights and opportunities as everyone else.
The ADA is often described as an equal opportunity law. In many ways, it was modeled after the Civil Rights Act of 1964, which prohibited discrimination based on characteristics such as race, religion, sex, and national origin.
By establishing accessibility requirements and anti-discrimination protections, the ADA helps remove barriers that can limit participation in everyday activities.

Who Is Protected by the ADA?

The ADA protects qualified individuals with disabilities. While the law does not list every covered condition, protection generally applies to individuals who:
  • Have a physical or mental impairment that substantially limits one or more major life activities
  • Have a history or record of such an impairment
  • Are regarded by others as having such an impairment

How Did the ADA Come to Be?

The ADA’s development began in the 1980s as disability advocates and policymakers worked to create comprehensive civil rights protections for individuals with disabilities.
In 1986, the National Council on Disability (NCD), then known as the National Council on the Handicapped, published its report Toward Independence. The report included legislative recommendations that helped lay the groundwork for the ADA.
The first version of the bill was introduced during the 100th Congress in 1988 by Senator Lowell Weicker and Representative Tony Coelho.
Following additional revisions and advocacy efforts, a new version was introduced in 1989 by Senator Tom Harkin, Senator Dave Durenberger, Representative Tony Coelho, and Representative Hamilton Fish. The bill passed the Senate by a vote of 76 to 8 later that year.

When was the ADA Signed into Law?

After years of discussion, revisions, and bipartisan support, the ADA was approved by Congress and signed into law by President George H.W. Bush on July 26, 1990.
More than 3,000 people attended the signing ceremony on the South Lawn of the White House.
President Bush later reflected on the legislation:
“I supported the ADA because I think it was the fair and right thing to do. I think there are a lot of people who, if given access to the workplace, for example, can achieve things. It seemed to me that legislation was needed that provided as much fairness, as much access, as possible.”

Was There Any Opposition to the ADA?

Like many major pieces of legislation, the ADA faced opposition from some organizations and business groups.
Concerns primarily centered on the potential costs associated with making facilities and services accessible. Some religious organizations objected to being classified as “public accommodations,” while certain transportation providers raised concerns about increased operating costs.
During the legislative process, revisions and compromises were made to address some of these concerns. Ultimately, the bill gained sufficient support and was enacted into law.

What Does the ADA Cover?

The ADA is divided into five sections called titles. Each title addresses a different area of public life and establishes requirements intended to ensure accessibility and equal opportunity.

Title I (Employment)

Title I prohibits discrimination against qualified individuals with disabilities in employment.
Employers must provide reasonable accommodations to qualified applicants and employees unless doing so would create an undue hardship. Individuals with disabilities must have equal access to employment opportunities, hiring processes, benefits, and workplace advancement.

Title II (State and Local Government)

Title II prohibits disability-based discrimination in programs, services, and activities provided by state and local governments.
This includes government agencies, departments, public institutions, and other public entities.

Title III (Public Accommodations)

Title III applies to private businesses and facilities that serve the public.
These organizations must provide accessible environments and cannot discriminate against individuals with disabilities.
Examples of public accommodations include:
  • Hotels
  • Retail stores
  • Restaurants
  • Golf courses
  • Private schools
  • Healthcare facilities
  • Day care centers
  • Stadiums
  • Movie theaters
  • And many other public-facing facilities
To establish Title III establishes minimum accessibility standards for new construction, facility alterations, and barrier removal where required.

Title IV (Telecommunications)

Title IV requires telecommunications providers to offer services that enable individuals with hearing or speech disabilities to communicate by telephone.
The title also includes requirements related to telecommunications relay services and closed captioning of federally funded public service announcements.
The Federal Communications Commission (FCC) oversees these requirements.

Title V (Miscellaneous Provisions)

Title V addresses several provisions that apply across the ADA, including:
  • Relationships between the ADA and other laws
  • Attorney fees
  • Insurance considerations
  • State immunity
  • Illegal drug use

Why Do Business Owners Need to Be Familiar with the ADA?

Business owners, facility managers, architects, contractors, and other industry professionals should understand how ADA requirements apply to the spaces they design, manage, or occupy.
Under Title III, businesses that serve the public may be required to provide accessible features and accommodations.
Potential compliance issues can include:
  • Inaccessible entrances
  • Missing or improperly designed ramps
  • Improperly installed hardware
  • Noncompliant signage
  • Other barriers that limit accessibility
Failure to comply can result in legal disputes, enforcement actions, financial penalties, and reputational damage.
Beyond compliance, accessibility helps create spaces that better serve employees, visitors, customers, patients, students, and community members. An accessible environment reflects a commitment to inclusion and usability for everyone.

Takeaway

The Americans with Disabilities Act remains one of the most significant civil rights laws in the United States. Its requirements have helped improve accessibility across workplaces, public facilities, transportation systems, and countless other environments.
For organizations responsible for buildings and public-facing spaces, understanding ADA requirements is an important part of maintaining accessible, compliant facilities.
At Erie Custom Signs, we work with sign shops, contractors, architects, healthcare organizations, educational institutions, and facility professionals to provide ADA-compliant signage solutions that support accessibility goals and regulatory requirements. If you’re evaluating signage for a new project or facility upgrade, our team can help you identify practical solutions that align with ADA standards.

Frequently Asked Questions

What is the Americans with Disabilities Act?

The ADA is a federal civil rights law that prohibits discrimination against individuals with disabilities and helps ensure equal access to employment, public services, transportation, telecommunications, and public accommodations.

Who is protected by the ADA?

Individuals with physical or mental impairments that substantially limit major life activities, those with a history of such impairments, are protected under the ADA.

What are the five titles of the ADA?

The ADA consists of five titles covering employment, state and local government services, public accommodations, telecommunications, and miscellaneous legal provisions.

Does the ADA apply to private businesses?

Yes. Title III applies to many private businesses and facilities that serve the public, including retail stores, restaurants, hotels, healthcare facilities, and educational institutions.

Why is ADA compliance important?

ADA compliance helps organizations reduce legal risk, improve accessibility, enhance user experience, and create more inclusive environments for employees and visitors alike.

Top 10 Indoor ADA Signs Every School Campus Needs

Top 10 Indoor ADA Signs Every School Campus Needs

Guiding individuals through touch and sight.
Creating an accessible school environment means ensuring every student, staff member, and visitor can confidently navigate your campus, especially inside buildings. Indoor ADA signage plays an important role in supporting accessibility, improving wayfinding, and helping educational facilities meet ADA requirements.
At Erie Custom Signs, our mission is “Guiding Individuals through Sight and Touch.” We specialize in high-quality indoor ADA signage that helps schools create more accessible, welcoming environments while simplifying the signage planning process.
Here are the top 10 indoor ADA signs every school campus should consider.

1. Classroom Identification Signs

Why it matters:
Classrooms are where learning happens, and clear, tactile signage helps students, staff, and visitors quickly identify the correct room.
Look for:
  • Raised tactile letters with Grade 2 Braille
  • High-contrast colors and non-glare finishes
  • Installation on the latch side of the door, typically 48 to 60 inches above the floor
How we help:
We provide classroom signs designed to meet ADA standards and help schools determine the right specifications for each space.

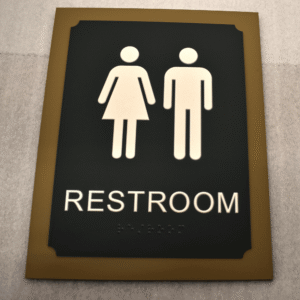
2. Restroom Signs

Why it matters:
Restrooms require clear identification, including pictograms, tactile text, and the International Symbol of Accessibility (ISA) where applicable.
Look for:
  • Door-mounted and wall-mounted signage where required
  • Raised tactile text and Braille
  • Pictograms at least 6 inches tall
How we help:
We guide schools through available signage options and provide durable restroom signs designed to support ADA compliance goals.

3. Exit Signs

Why it matters:
Clearly marked exits are essential for safety and can help occupants navigate emergency evacuation routes.
Look for:
  • Raised tactile text and Braille
  • Consistent, visible placement at exit doors

4. Elevator & Stairwell Signs

Why it matters:
Elevators and stairwells are key navigation points, particularly for individuals with mobility or visual impairments.
Look for:
  • Floor-level markers featuring tactile characters and Braille
  • Stairwell identification signs with clear location and exit information
How we help:
We help specify the signage needed to support ADA recommendations and inspection requirements.

5. Office and Administrative Signs

Why it matters:
Spaces such as the principal’s office, nurse’s office, counseling offices, and administrative departments should be clearly identified to promote independent navigation.
Look for:
  • Raised tactile text and Braille
  • Consistent design and mounting throughout the facility
How we help:
We provide signage recommendations and layout guidance to create a cohesive, accessible signage program.

6. Accessible Entrance Signs (Indoor Directional Signage)

Why it matters:
When the accessible entrance is not the primary entrance, directional signage helps visitors locate accessible routes quickly and confidently.
Look for:
  • ISA symbols combined with clear directional arrows
  • Easy-to-read messaging and consistent placement
How we help:
We design indoor directional signage that supports wayfinding and improves the visitor experience.

7. Cafeteria and Common Area Signs

Why it matters:
Shared spaces such as cafeterias, libraries, gyms, and media centers should be easy for everyone to identify and access.
Look for:
  • Tactile lettering and Braille
  • Glare-free finishes and strong contrast
  • Consistent visual design across campus
How we help:
We provide signage solutions that align with both accessibility goals and facility branding standards.

8. Directional and Wayfinding Signs

Why it matters:
Wayfinding signage helps students, staff, parents, and visitors move efficiently throughout hallways, intersections, and larger facilities.
Look for:
  • Clear arrows, room numbers, and directional information
  • Tactile and Braille elements where appropriate
  • Placement at major decision points
How we help:
We create ADA-friendly wayfinding systems tailored to your school’s layout and traffic flow.

9. Emergency Shelter and Safe Room Signs

Why it matters:
In an emergency, occupants must be able to identify shelters and designated safe areas quickly.
Look for:
  • Tactile and Braille signage
  • High visibility and easy-to-understand messaging
  • Consistent placement throughout the facility
How we help:
Our signs support accessibility initiatives while helping schools strengthen their emergency preparedness efforts.

10. Training and Multi-Purpose Room Signs

Why it matters:
Rooms that serve multiple functions should be clearly identified so students, staff, and visitors can easily locate them.
Look for:
  • Raised tactile characters and Braille
  • Room identification that reflects intended use when appropriate
How we help:
We provide flexible signage options that can adapt to changing room functions and facility needs.

Why Indoor ADA Signage Matters in Schools

ADA signage does more than help facilities meet accessibility requirements. It improves the overall experience for students, staff, parents, and visitors by making buildings easier to navigate and more welcoming to everyone.
A consistent signage program can also simplify maintenance, renovations, and campus-wide wayfinding efforts.

Frequently Asked Questions

What ADA signs are required in a school?

Most schools use ADA-compliant signs for permanent rooms and spaces such as classrooms, restrooms, offices, stairwells, elevators, and other identified areas.

Do classroom signs need Braille?

Permanent room identification signs are generally required to include tactile characters and Grade 2 Braille in accordance with ADA standards.

Where should ADA signs be mounted?

Many ADA room identification signs are mounted on the latch side of the door and placed within the required mounting height range. Specific applications may vary.

What is the difference between directional and identification signs?

Identification signs label a specific room or space, while directional signs help users find their destination.

Your Next Step

Planning ADA signage for a school campus can feel overwhelming, especially when multiple buildings, renovations, or accessibility requirements are involved.
That’s where Erie Custom Signs can help. We work with schools, architects, contractors, and facilities teams to simplify the specification process and provide high-quality indoor ADA signage tailored to each project.

ADA Automatic Door Signage Requirements: Best Practices for Accessibility and Safety

ADA Automatic Door Signage Requirements: Best Practices for Accessibility and Safety

By David Murphy | September 12, 2025
Automatic doors make buildings more welcoming by removing barriers and allowing people to enter independently. However, without proper ADA signage, visitors may hesitate, become confused, or miss the accessible entrance altogether.
For architects, contractors, facility managers, and sign professionals, accessibility is more than a compliance requirement. It’s an important part of creating spaces that serve everyone effectively. With one in four adults in the U.S. living with a disability, ADA-compliant signage helps support accessibility while meeting regulatory requirements.
ADA automatic door signage requirements help ensure that accessible entrances are easy to identify and use. This article covers five best practices for compliant automatic door signage and explains how Erie Custom Signs helps organizations implement Braille and tactile signage solutions that support accessibility and wayfinding.

ADA Automatic Door Signage Requirements: 5 Best Practices

Automatic doors improve accessibility only when visitors can easily locate, understand, and operate them. Following ADA signage requirements helps people navigate a facility safely and independently.

1. Place Signage in Compliant and Visible Locations

Interior signs should be easy to locate, read, and access. ADA guidelines (ADAAG §703.4.1) require tactile signs to be mounted on the wall adjacent to the latch side of the door whenever possible.
For double doors without a clear latch side, signage should be installed on the right-hand push side. Tactile signs should be mounted so the baseline of the lowest tactile character is at least 48 inches above the finished floor, and the baseline of the highest tactile character is no more than 60 inches above the floor.
Visibility is equally important. Open doors, furniture, and other fixtures should not block signs or restrict access. For example, a public restroom with an automatic door should have restroom signage mounted beside the doorway rather than on the door itself, ensuring the sign remains accessible whether the door is open or closed.

2. Design Signage with Compliant Tactile and Braille Elements

ADA standards require tactile lettering and Grade 2 Braille to help individuals with visual impairments identify rooms, entrances, and amenities.
Raised characters must extend at least 1/32 inch from the sign surface and use easy-to-read, sans-serif fonts. Decorative, script, or italic typefaces should be avoided because they are difficult to read by touch.
Signs should also feature:
  • Grade 2 Braille with rounded, domed dots
  • Non-glare finishes
  • Strong contrast between text and background colors
These design elements improve readability for people with low vision while helping facilities meet ADA signage requirements.

3. Include Accessibility Symbols and Motion Indicators

Standardized symbols and clear operating instructions help users understand how an automatic door functions before approaching it.
If a facility has accessible entrances, the International Symbol of Accessibility (ISA) should be used where required to identify those entrances. Additional indicators such as directional arrows, “PUSH TO OPEN” instructions, or motion activation symbols help reduce confusion and improve the user experience.
For example, an elevator lobby with automatic doors may include both the ISA symbol and a sign identifying a motion sensor activation area. Clear visual communication benefits all visitors, not only those with disabilities.

4. Provide Instructions for Manual Override or Alternate Access

Automatic doors occasionally require maintenance or may include a manual operating mode. When alternate access routes or manual operation are available, signage should communicate that information clearly.
Instructions might include:
  • How to manually operate the door
  • The location of another accessible entrance
  • Contact information for assistance when appropriate
Providing clear guidance minimizes uncertainty and helps visitors maintain independent access throughout the facility.

5. Maintain Consistent Signage Across the Facility

ADA regulations establish minimum requirements, but consistency throughout a building can significantly improve wayfinding and usability.
Using the same design standards, tactile elements, Braille formatting, symbols, and mounting practices across all automatic doors helps visitors navigate with greater confidence. Consistent signage also simplifies facility audits, maintenance programs, and future expansion projects.
For organizations managing multiple locations, standardized signage specifications can help create a more uniform and compliant environment.

Quick Reference: ADA Automatic Door Signage Requirements

To support accessibility, automatic door signage should:
  • Be mounted in ADA-compliant locations
  • Include tactile lettering and Grade 2 Braille when required
  • Use high-contrast, non-glare materials
  • Feature recognized accessibility symbols where applicable
  • Provide clear operating instructions and alternate access information
  • Remain consistent throughout the facility

Signs That Guide to Doors That Serve

Automatic doors can make facilities more accessible, but effective signage is what helps people confidently use them. Proper placement, tactile elements, Braille, accessibility symbols, and clear instructions all contribute to a better user experience while supporting ADA compliance.
For contractors, architects, facility managers, and sign professionals, selecting the right signage is an important part of delivering inclusive environments that work for every visitor.
Erie Custom Signs specializes in wholesale ADA signage and interior sign solutions designed to meet regulatory requirements while supporting wayfinding and accessibility goals. With a wide range of materials, customization options, and ADA-compliant designs, our team helps trade professionals deliver signage programs with confidence.
If you’re planning an accessible facility or updating existing signage, explore Erie Custom Signs‘ custom ADA sign solutions to support compliance, consistency, and a better experience for everyone who enters your building.

FAQ

Where should ADA signs be placed for automatic doors?

ADA tactile signs are generally mounted on the wall adjacent to the latch side of the door. For double doors without a latch side, signs are typically placed on the right-hand push side.

Do automatic doors require Braille signage?

When signage is required to identify permanent rooms or spaces, ADA standards generally require tactile characters and Grade 2 Braille. Requirements may vary depending on the sign’s purpose and location.

What height should ADA door signs be mounted?

ADA guidelines specify mounting heights between 48 and 60 inches above the finished floor for tactile signage.

What symbol is used to identify accessible entrances?

The International Symbol of Accessibility (ISA) is commonly used to identify accessible entrances and routes when required by ADA standards.

Certificate of Occupancy Requirements & ADA Signage

Certificate of Occupancy Requirements & ADA Signage

Why Is Meeting Certificate of Occupancy Requirements Crucial?

Meeting certificate of occupancy requirements is essential because it allows your client to legally occupy and use the building. If the building fails inspection, the required conditions have not been met, and the certificate of occupancy cannot be issued.

Without that certificate, the building cannot be occupied.

That alone makes the inspection process critical, but there are several additional consequences that can result from failing to meet certificate of occupancy requirements.

These may include:

  • Your client having to spend additional money correcting items that do not comply with building and safety codes.
  • Project delays that can push completion back by weeks or even months.
  • Additional inspection fees once corrections have been completed.
  • Potential fines or legal action if repairs are not completed within the required timeframe.
  • A vacate order if the building owner is already occupying the property.
  • An inability for landlords to legally collect rent until the certificate of occupancy has been issued.

These are all possibilities that should be considered during the planning and construction process.

Failing to meet certificate of occupancy requirements can have significant consequences, not only for your client but also for your reputation. If a project is delayed because required items were overlooked, your client may hold your firm responsible. Dissatisfied clients may also be less likely to recommend your services or work with you again in the future.

How Does ADA Signage Fit into Certificate of Occupancy Requirements?

Although ADA signage is sometimes overlooked during construction projects, it plays an important role in meeting certificate of occupancy requirements. Certain types of required building signage, particularly ADA-compliant identification signs, are part of what inspectors look for during the final building inspection. They verify that both federal ADA requirements and any applicable state or local regulations have been met.

As mentioned earlier, certificate of occupancy requirements can vary from one jurisdiction to another. However, because the Americans with Disabilities Act is a federal law, ADA signage requirements apply to public buildings across the country. Before a certificate of occupancy can be issued, the required ADA signage must be installed.

Here’s why.

The Americans with Disabilities Act (ADA) protects individuals with disabilities, including those with visual impairments, from discrimination. One way the law accomplishes this is by ensuring people with disabilities have equal access to public buildings and private businesses that serve the public. To comply with the ADA, facilities must provide reasonable accommodations, and that includes installing the proper signage throughout the building.

What Is the Required Building Signage for a Certificate of Occupancy?

In general, the required building signage for a certificate of occupancy includes ADA-compliant signs installed throughout the facility. Buildings that are open to the public must include appropriate signage to identify permanent spaces, provide important information, and assist with wayfinding. These signs are commonly reviewed during the inspection process before a certificate of occupancy is issued.

More specifically, several types of ADA-compliant signs are typically required to help meet certificate of occupancy requirements. Each of these signs must be designed according to ADA sign specifications.

Examples include:

Room Signs

Any room that serves the same function for more than one week should be identified with an ADA-compliant room sign that includes the required tactile and visual features.

Restroom Signs

Every restroom should be clearly identified with signage that indicates whether it is designated for men, women, or all genders, as well as whether it is accessible.

Exit Signs

Exit routes should be identified with signage that is easy for all occupants to locate and understand.

Elevator Signs

Elevators should be identified with ADA-compliant signage that helps users locate accessible routes throughout the building.

Stair Signs

Stairways should be identified with properly placed signs adjacent to the stairwell entrance to improve safety and navigation.

It’s important to remember that not every sign in a building is required to meet ADA standards. Temporary signs, building directories, and some informational displays generally are not subject to the same ADA signage requirements. However, permanent room identification signs and similar displays must comply with applicable ADA guidelines.

Why You Should Include ADA Sign Installation in Your Projects

As an architect, you likely view accessible design as a standard part of every project. Chances are that you already reference the 2010 ADA Standards for Accessible Design to ensure your buildings include the required accessibility features. However, one area that can sometimes be overlooked is signage.

By including ADA sign installation as part of your project planning, you can provide a more complete solution for your clients. Not only does this help ensure certificate of occupancy requirements are met, but it also takes one more responsibility off your client’s plate. Many business owners are unfamiliar with ADA signage requirements and can find the process overwhelming.

Making ADA signage part of your project helps ensure every detail has been addressed before the final inspection. It also demonstrates your commitment to delivering a building that is fully functional, accessible, and ready for occupancy.

When ADA signage is considered from the beginning of the project instead of as an afterthought, the installation process becomes much smoother. It can also help avoid last-minute delays, additional costs, or failed inspections caused by missing or noncompliant signage.

Taking the time to include ADA signage in your project planning ultimately benefits both you and your client. It helps create a better experience while ensuring the building is prepared for occupancy from day one.

Takeaway

Meeting certificate of occupancy requirements involves much more than completing construction. Every aspect of a building must comply with applicable codes before it can be approved for occupancy, and ADA signage is an important part of that process.

Understanding the required building signage for a certificate of occupancy allows architects, contractors, and building owners to avoid unnecessary delays, additional expenses, and compliance issues. Proper ADA signage helps ensure buildings are accessible, supports successful inspections, and contributes to a safer experience for everyone who uses the facility.

If you’re looking for affordable, high-quality, fully customizable ADA-compliant signs for your next project, Erie Custom Signs has you covered. Our selection of ADA sign packages makes it easy to find signage that meets both your design goals and compliance requirements, helping your project move smoothly from construction to occupancy.

ADA Compliance for Commercial Buildings: Who’s Responsible?

ADA Compliance for Commercial Buildings: Who’s Responsible & More

By Mike Shabluk | March 26, 2024

What Features Are Required in Commercial Buildings?

Commercial buildings are generally covered under Title III of the ADA and must comply with the 2010 ADA Standards for Accessible Design.
Requirements vary based on the building type, size, and scope of renovations, but common accessibility features include:

Doorways

Doorway openings should provide a clear width between 32 inches (minimum) and 48 inches (maximum).

Ramps

Ramp runs should have a slope no steeper than 1:12. Existing sites may be permitted steeper slopes when space limitations make compliance difficult.

Drinking Fountains

Drinking fountains must have spout outlets no higher than 36 inches above the floor. The spout must also meet ADA setback requirements.

Hardware and Fixtures

Doors, fixtures, and hardware should be operable without tight grasping, pinching, or twisting of the wrist. Lever handles and U-shaped pulls are common solutions.

Accessible Parking

The required number of accessible parking spaces depends on the total size of the parking lot. For example, lots with 1–25 spaces must provide at least one accessible space.

Handrails

Handrails should be installed on both sides of stairs and ramps and remain continuous for the entire run.

Bathrooms

Accessible restrooms must provide compliant stalls, maneuvering clearances, and sufficient floor space around fixtures. Typically, wheelchair users must have clear space measuring at least 30 inches by 48 inches.

Signage

ADA-compliant signs should have a non-glare finish and strong visual contrast between text and background. Signs identifying permanent rooms or spaces generally require braille and tactile lettering.
These examples represent only a portion of ADA requirements. Compliance can be far more complex depending on the building and occupancy type. That is why property owners and tenants should review the 2010 ADA Standards for Accessible Design and perform an accessibility audit when evaluating an existing facility.

Why Is ADA Compliance for Commercial Buildings Important?

ADA compliance is both a legal obligation and a sound business practice.
The ADA was signed into law in 1990 to prevent discrimination against individuals with disabilities. Commercial properties that fail to provide equal access can face legal, financial, and reputational consequences.
Potential consequences of noncompliance include:
  1. Damage to business reputation
    If customers, visitors, or employees encounter accessibility barriers, it can negatively affect public perception and customer trust.
  2. Fines and penalties
    Building inspectors or enforcement agencies may identify violations that require corrective action. Financial penalties can be significant.
  3. Lawsuits and legal expenses
    Individuals who experience accessibility barriers may pursue legal action. Addressing violations proactively is often far less costly than defending a claim.
Beyond avoiding fines and lawsuits, ADA compliance helps ensure that all individuals can safely and comfortably access a facility. Accessibility benefits users, employees, visitors, and businesses alike.

Who’s Responsible for ADA Compliance for Commercial Properties?

Quick Answer

In most cases, both landlords and tenants can have ADA responsibilities. The specific division of responsibility often depends on the nature of the issue, the terms of the lease, and the area of the property involved.
Generally speaking:
  • Operational compliance issues are often the tenant’s responsibility.
  • Physical accessibility improvements are frequently a shared responsibility.
  • Common areas and building access are typically the landlord’s responsibility.
Let’s take a closer look.

Tenant Responsibility

In some situations, the tenant may be solely responsible for ADA compliance requirements. In others, responsibility may be shared with the property owner.
As a general rule, accessibility issues tied directly to business operations typically fall on the tenant.
It’s also important to note that lease agreements may outline how compliance responsibilities are divided. However, those lease provisions do not necessarily determine liability under the ADA.
Examples of tenant responsibilities may include:
  • Ordering and installing ADA-compliant signage
  • Maintaining accessible customer service practices
  • Ensuring operational accessibility within leased spaces
For larger physical modifications, responsibility may be shared with the property owner.
Examples include:
  • Installing ramps
  • Adding elevators
  • Making significant accessibility upgrades within leased areas

Landlord Responsibility

Property owners are responsible for providing access to the building and maintaining accessibility in areas under their control.
Landlords are generally expected to address accessibility barriers when renovations occur. In some cases, barrier removal may also be required when it is considered readily achievable, meaning it can be accomplished without significant difficulty or expense.
Owners are typically responsible for:
  • Building entrances
  • Accessible parking areas
  • Shared hallways
  • Common areas
  • Shopping mall common spaces
  • Certain lobbies and other non-leased public areas
Because accessibility obligations can vary by property, disputes occasionally arise. When disagreements occur regarding compliance responsibilities or required modifications, the Department of Justice may ultimately determine the extent of required changes.

Takeaway

ADA compliance for commercial buildings is essential for creating accessible environments and avoiding costly compliance issues.
While responsibility may fall on the landlord, the tenant, or both parties, understanding those obligations is the first step toward reducing risk and maintaining compliance.
For existing buildings, performing an accessibility audit can help identify barriers before they become larger problems. And when signage upgrades are part of the solution, working with an experienced ADA signage partner can help ensure requirements are met accurately and efficiently.
If you’re evaluating signage as part of an ADA compliance project, Erie Custom Signs can help guide you through ADA signage requirements and provide solutions designed for commercial facilities, healthcare environments, education, government, and other professional settings.

FAQ

Who is responsible for ADA compliance in a commercial building?

Responsibility may fall on the landlord, the tenant, or both. Landlords are typically responsible for building access, parking, and common areas, while tenants are often responsible for operational accessibility issues within their leased space.

Can a lease make the tenant responsible for ADA compliance?

A lease can allocate responsibilities between the landlord and tenant. However, lease provisions do not necessarily determine liability under the ADA.

Are ADA-compliant signs required in commercial buildings?

Yes. Permanent room identification signs generally require tactile lettering, braille, appropriate contrast, and a non-glare finish.

What happens if a commercial property is not ADA compliant?

Potential consequences include accessibility complaints, required corrective actions, financial penalties, legal disputes, and reputational damage.

Do older commercial buildings have to comply with the ADA?

Many older buildings must remove accessibility barriers when doing so is readily achievable or when renovations trigger accessibility requirements. The specific obligations depend on the property and circumstances.

A Comprehensive Guide to ADA Sign Specifications

A Comprehensive Guide to ADA Sign Specifications

By Mike Shabluk | July 4, 2023


Understanding ADA sign specifications is essential for anyone involved in designing, manufacturing, specifying, or installing interior signage. Whether you’re a sign company, contractor, architect, designer, or facility manager, overlooking even a small requirement can result in noncompliant signage that creates unnecessary delays, failed inspections, or costly corrections.

The challenge is that ADA signage requirements are spread across lengthy standards filled with technical language and detailed measurements. Finding clear, practical answers isn’t always easy.

That’s why we created this comprehensive guide.

At Erie Custom Signs, we’ve helped thousands of sign professionals produce ADA-compliant signage with confidence. This guide brings together the most important ADA sign specifications in one place, making it easier to understand not only what the requirements are, but why they matter.

Whether you’re new to ADA signage or simply need a reliable reference, this resource will walk you through the requirements for tactile lettering, Braille, pictograms, mounting locations, installation, compliance, and much more.

What Role Does Signage Play in the ADA?

Signage plays an important role in fulfilling the purpose of the Americans with Disabilities Act (ADA), which is to provide equal access, opportunity, and independence for individuals with disabilities.

Under Title III of the ADA, businesses and facilities that are open to the public must meet accessibility standards and make reasonable accommodations for individuals with disabilities. One of those accommodations is properly designed and installed signage.

Although signs may seem like a relatively small part of a building, they have a significant impact on accessibility. Properly designed ADA signs allow individuals with visual impairments to identify permanent rooms, locate important spaces, and navigate buildings safely and independently.

Without compliant signage, visitors may struggle to find essential areas such as restrooms, exits, stairwells, elevators, or offices. ADA-compliant signs help remove those barriers, making buildings easier to use for everyone.

Simply put, accessible signage supports the overall mission of the ADA by creating environments that are more inclusive and easier to navigate.

What Are ADA Signs?

ADA signs are signs that meet the accessibility standards established by the Americans with Disabilities Act for identifying permanent rooms, spaces, and building features.

These signs are specifically designed to assist individuals with visual impairments through a combination of visual and tactile elements. Depending on the type of sign, ADA-compliant signs may include:

  • Raised tactile lettering
  • Grade 2 Braille
  • High visual contrast
  • Non-glare finishes
  • Approved fonts and character spacing
  • Accessibility pictograms where required

Most ADA signs are installed throughout commercial, healthcare, educational, hospitality, and government facilities to identify permanent spaces such as:

  • Restrooms
  • Offices
  • Conference rooms
  • Stairwells
  • Elevators
  • Exit routes
  • Mechanical rooms
  • Utility spaces

Many people use the terms Braille signs, tactile signs, and ADA signs interchangeably. While Braille and tactile lettering are often required components, ADA sign specifications cover much more than those individual features. Compliance also includes character sizing, spacing, finishes, mounting height, placement, and other detailed design requirements.

What Makes a Sign ADA Compliant?

Not every sign inside a building must meet the same ADA requirements. The exact ADA sign specifications depend on the sign’s purpose.

For example, signs identifying permanent rooms or spaces have much stricter requirements than informational or temporary signs.

To be considered ADA compliant, identification signs generally must satisfy several key requirements related to both design and installation.

These requirements typically include:

  • A non-glare finish
  • High contrast between characters and the background
  • ADA-compliant fonts and character dimensions
  • Raised tactile lettering
  • Grade 2 Braille
  • Approved pictograms when required
  • Proper mounting location and installation height

Every one of these elements works together to make the sign accessible for individuals with visual impairments while helping businesses remain compliant with federal accessibility standards.

In the following sections, we’ll examine each of these ADA sign specifications in greater detail, beginning with raised and visual characters.

What Are the Guidelines for Raised and Visual Characters?

According to the 2010 ADA Standards for Accessible Design, raised characters on ADA identification signs must meet several specific requirements.

Depth – Characters must be raised at least 1/32 inch (0.8 mm) above the background.

Case
– Raised characters should be uppercase.

Font Style
– Characters must use an ADA-compliant sans serif font. Italic, script, oblique, decorative, or unusual fonts are not permitted.

Character Proportions
– The width of the uppercase “O” must be between 55% and 110% of the height of the uppercase “I.”

Character Height
– Measured vertically from the baseline, raised characters must be between 5/8 inch and 2 inches tall, based on the uppercase “I.” When raised and visual characters display the same information on one sign, the raised characters may be reduced to 1/2 inch minimum.

Stroke Thickness
– The stroke thickness of the uppercase “I” may not exceed 15% of the character height.

Character Spacing
– Character spacing is measured between the closest points of adjacent raised characters, excluding spaces between words.
  • Characters with rectangular cross sections must have spacing between 1/8 inch and four times the stroke width.
  • Characters with other cross sections must be spaced between 1/16 inch and four times the stroke width at the base, and between 1/18 inch and four times the stroke width at the top.
  • Raised characters must also remain at least 3/8 inch away from raised borders or decorative elements.

Line Spacing – The spacing between baselines of separate lines of raised text must be between 135% and 170% of the raised character height.

Visual characters used on directional and informational signage follow many of the same rules but include several important differences.

Unlike tactile characters, visual characters do not have depth requirements and may use uppercase, lowercase, or a combination of both. Fonts should remain conventional and free of decorative styling.

Character proportions remain the same, but visual character height is determined by both the mounting height of the sign and the expected viewing distance.

For example:
  • When the baseline of the character is 40 to 70 inches above the floor and the viewing distance is less than 72 inches, characters must be at least 5/8 inch tall.
  • Beyond 72 inches, the minimum height increases by 1/8 inch for every additional foot of viewing distance.
  • Different minimum character heights apply when signage is mounted above 70 inches or 120 inches from the floor.

Stroke thickness for visual characters must fall between 10% and 30% of the character height, while character spacing should be between 10% and 35% of the character height. Line spacing follows the same requirements as tactile characters.

When both tactile and visual characters are required, businesses have two options:

  • Install a single sign that includes both tactile and visual information.
  • Install two separate signs, with one displaying tactile characters and the other visual characters.

Providing both types of information ensures signage is accessible for individuals who rely on touch as well as those who primarily read signs visually.

What Are the Guidelines for Braille?

Braille is one of the defining features of ADA-compliant identification signage.

Any sign identifying a permanent room, space, or feature must include Grade 2 Braille, which uses contractions to improve reading efficiency. The braille dots must have a rounded or domed shape to ensure they can be easily read by touch.

To comply with ADA standards, Braille must meet the following specifications:

  • Dot base diameter: 0.059–0.063 inches
  • Distance between dots within the same cell: 0.090–0.100 inches (center to center)
  • Distance between corresponding dots in adjacent cells: 0.241–0.300 inches
  • Dot height: 0.025–0.037 inches
  • Distance between corresponding dots in rows: 0.395–0.400 inches

The ADA also specifies that capitalization indicators should only be used before the first word of a sentence, proper nouns, individual letters, initials, and acronyms.

Because Braille spacing is extremely precise, it’s one of the areas where fabrication errors most commonly lead to non-compliance. Working with an experienced ADA sign manufacturer helps ensure every detail meets federal standards.

What Are the Guidelines for Finish and Contrast?

ADA requirements don’t stop with lettering. The finish and color contrast of a sign also play an important role in readability.

Identification, informational, and directional signs must all feature a non-glare finish, such as matte or eggshell. Glossy surfaces can create reflections that make text difficult to see under certain lighting conditions.

Signs must also provide a high level of contrast between the background and all visual characters. Although the ADA does not specify an exact percentage, many industry professionals recommend aiming for approximately 70% contrast to maximize readability.

Good contrast allows people with low vision to distinguish text more easily, making signage more effective for everyone who uses the building.

What Are the Guidelines for Pictograms?

Pictograms provide quick visual identification and are commonly used on restroom, elevator, stairway, and accessibility signs.

Whenever pictograms appear on ADA signage, they must follow several requirements.

Like text, pictograms must have a high-contrast, non-glare finish that makes them easy to see.

The pictogram itself must be placed inside a field that is at least six inches high, and any required text description must appear directly below the pictogram field, not inside it.

Proper spacing between the pictogram and the descriptive text helps maintain readability while ensuring the sign complies with ADA standards.

Do All ADA Signs Need Pictograms?

No. While pictograms are common on many ADA signs, they are not required on every ADA-compliant sign.

The 2010 ADA Standards specifically recognize only four standardized accessibility symbols:

  • International Symbol of Accessibility
  • International Symbol of TTY
  • Volume Control Telephone Symbol
  • International Symbol of Access for Hearing Loss

The International Symbol of Accessibility is the one most people recognize. It identifies areas and features that are accessible to individuals with mobility disabilities, such as accessible entrances, parking spaces, and restrooms.

Although not required on every sign, pictograms are considered a best practice for many applications because they allow people to quickly identify a room or facility regardless of language.

They’re commonly used on:

  • Restroom signs
  • Elevator signs
  • Stairwell signs
  • Exit signs
  • Accessible entrances
  • Family or all-gender restrooms

When used correctly, pictograms improve wayfinding while supporting both ADA compliance and overall user experience.

Are All Indoor Signs Required to Be ADA Compliant?

No. One of the biggest misconceptions about ADA signage is that every sign inside a building must comply with ADA standards.

In reality, ADA requirements primarily apply to permanent signs that identify rooms, spaces, or building features.

According to Chapter 216 of the 2010 ADA Standards for Accessible Design, identification signs for permanent rooms such as restrooms, offices, stairwells, elevators, and exits generally require tactile characters and Grade 2 Braille.

Directional and informational signs have different requirements. While they must still follow ADA guidelines for visual characters, finish, and contrast, they generally do not require tactile lettering or Braille unless they identify a permanent space.

Many common interior signs are exempt from ADA requirements altogether.

Examples include:

  • Temporary signs displayed for less than one week
  • Building directories
  • Lobby displays
  • Menus
  • Promotional signage
  • Seat and row designations
  • Digital displays

Understanding which signs require ADA compliance can help businesses avoid unnecessary costs while ensuring permanent identification signage meets federal regulations.

Do ADA Sign Specifications Vary by Location?

Federal ADA standards apply throughout the United States, providing a consistent baseline for accessible signage.

However, many states, counties, and municipalities have adopted additional accessibility requirements that go beyond the federal standards.

California is one of the best-known examples. The state has its own accessibility regulations that require specific restroom signage, mounting details, and geometric symbols that differ from federal ADA requirements.

Other states and local jurisdictions may also enforce additional building codes or accessibility standards.

Before manufacturing or installing signage, it’s always a good idea to verify local requirements with the Authority Having Jurisdiction (AHJ), building inspector, or permitting office. Working with an experienced ADA signage manufacturer can also help ensure your project complies with both federal and local regulations.

What Are the Guidelines for California Restroom Signs?

California restroom signs have some of the most unique accessibility requirements in the country.

Because California’s building code includes additional signage regulations, restroom signs often require two separate components to satisfy both federal ADA standards and California code. In some cases, however, a single custom sign can be designed to meet both requirements.

California restroom signage includes two primary elements.

Geometric Door Symbol

Each restroom door must display a raised geometric symbol that identifies the type of restroom.

The requirements are:

  • Men’s Restroom: A ¼-inch thick equilateral triangle with 12-inch sides.
  • Women’s Restroom: A ¼-inch thick circle with a 12-inch diameter.
  • Unisex or All-Gender Restroom: A ¼-inch thick equilateral triangle centered within a 12-inch diameter circle.

These symbols must:

  • Contrast visually with the door color.
  • Have rounded or chamfered edges.
  • Be centered horizontally on the door.
  • Be mounted between 58 and 60 inches above the finished floor.

Federal ADA Sign

In addition to the geometric door symbol, California also requires an ADA-compliant identification sign that includes:

  • Raised tactile lettering
  • Grade 2 Braille
  • California Braille spacing requirements
  • Proper mounting height and placement

Because California requirements differ from federal ADA standards, it’s important to verify that restroom signage complies with both codes before installation.

Where Are ADA Signs Required?

ADA signs are generally required in public buildings and facilities where they identify permanent rooms, spaces, or building features.

In most cases, identification signs should be installed adjacent to the entrance of each permanent room so individuals with visual impairments can locate and identify spaces independently.

Common locations requiring ADA signage include:

  • Restrooms
  • Elevators
  • Stairwells
  • Exit doors
  • Permanent offices
  • Meeting rooms
  • Mechanical rooms
  • Utility spaces

Signs may also be required anywhere permanent identification is necessary to help occupants safely navigate a building.

What Types of Businesses Must Have ADA Signs?

Any business or facility covered under Title III of the Americans with Disabilities Act is generally required to provide compliant signage.

This includes virtually any building that serves the public.

Examples include:

  • Hotels
  • Restaurants
  • Retail stores
  • Shopping centers
  • Office buildings
  • Hospitals
  • Medical clinics
  • Schools
  • Universities
  • Government buildings
  • Assisted living facilities
  • Entertainment venues

Whether you’re constructing a new building or updating an existing facility, ADA signage plays an important role in creating an accessible environment while helping reduce the risk of compliance issues.

Which Rooms Need to Have ADA Signs in Place?

ADA identification signs are required for permanent rooms and spaces.

A room is generally considered permanent if it serves the same purpose for more than one week.

Examples include:

  • Numbered rooms
  • Offices
  • Conference rooms
  • Restrooms
  • Kitchens
  • Break rooms
  • Exam rooms
  • Utility rooms
  • Electrical rooms
  • Mechanical rooms
  • Storage rooms
  • Changing rooms

Any permanent space that occupants need to identify independently should be evaluated for ADA signage requirements.

What Are the Guidelines for Installing ADA Signage?

Fabricating a compliant sign is only half the job. Proper installation is equally important, and even a perfectly manufactured sign can become non-compliant if it’s installed incorrectly.

Here are the basic ADA installation requirements to keep in mind.

Install Signs in the Proper Location

ADA signs with tactile characters should generally be mounted on the latch side of the door.

If there isn’t enough wall space on the latch side of a single door, or to the right of double doors with two active leaves, the sign may be mounted on the nearest adjacent wall.

Proper placement allows individuals to locate and read the sign without standing in the path of an opening door.

Mount Signs at the Correct Height

ADA identification signs should be installed so that:

  • The baseline of the lowest tactile character is at least 48 inches above the finished floor.
  • The baseline of the highest tactile character is no more than 60 inches above the finished floor.

California follows slightly different measurement requirements, using the bottom of the tactile characters rather than the baseline. Always verify state-specific installation requirements before mounting signage.

Provide Adequate Clear Floor Space

ADA signs must remain accessible after installation.

A clear floor space of at least 18 inches by 18 inches should be available near the sign, outside the swing path of the door whenever possible.

Individuals should also be able to approach within approximately 3 inches of the sign to comfortably read the tactile characters without encountering protruding objects or interfering with the door.

Proper installation is just as important as proper fabrication when it comes to ADA compliance.

(Need more installation guidance? Download our Ultimate Guide to Mounting ADA-Compliant Signs.)

Can You Install ADA Signs on Windows?

Yes. While wall mounting is generally preferred, ADA signs may be installed on windows when adequate wall space is unavailable.

When mounting signs on glass, the same ADA height requirements still apply. Care should also be taken to ensure the sign remains highly visible and isn’t obscured by window treatments, decals, or heavy reflections.

Can You Install ADA Signs on Doors?

Yes, in certain situations.

Although wall-mounted signs are preferred whenever possible, the ADA allows signs to be installed directly on doors under specific conditions.

Examples include:

  • Double doors with one active leaf: Mount the sign on the inactive door.
  • Double doors with two active leaves: Mount the sign on the wall to the right of the right-hand door whenever possible.

For single doors, a sign may also be mounted on the push side if the door closes automatically and does not have a hold-open device.

Proper placement helps ensure the sign remains accessible while avoiding interference from door movement.

What Are Some Common ADA Signage Mistakes?

Because ADA signage requirements are detailed, even experienced professionals occasionally make mistakes.

Some of the most common compliance issues include:

  • Missing Grade 2 Braille on identification signs
  • Poor contrast between characters and the background
  • Incorrect Braille spacing or dimensions
  • Improper character or line spacing
  • Decorative or non-compliant fonts
  • Incorrect mounting height
  • Installing signs on the wrong side of a doorway
  • Failing to install required ADA signage altogether

Many of these issues are easy to avoid by understanding the ADA Standards for Accessible Design and partnering with an experienced ADA sign manufacturer.

How Are ADA Sign Specifications Enforced?

Building inspectors are typically the first to review ADA signage during construction, remodeling, or occupancy inspections.

Ultimately, however, ADA compliance falls under the authority of the U.S. Department of Justice (DOJ), which enforces Title III of the Americans with Disabilities Act.

Businesses are responsible for ensuring their facilities remain compliant, even after renovations or changes to building layouts.

Regular inspections of existing signage can help identify potential compliance issues before they become costly problems.

What Are the Consequences of Noncompliance?

Failing to comply with ADA signage requirements can lead to much more than a failed inspection.

Businesses may face:

  • Department of Justice enforcement actions
  • Civil lawsuits
  • Expensive facility upgrades
  • Construction delays
  • Project redesigns
  • Damage to their reputation
  • Lost business opportunities

Under Title III of the ADA, the Department of Justice may seek civil penalties of up to $75,000 for a first violation and up to $150,000 for subsequent violations, in addition to any legal costs or required corrective actions.

For contractors, architects, property managers, and sign professionals, getting ADA signage right from the beginning is almost always less expensive than correcting mistakes later.

Takeaway

ADA sign specifications cover much more than tactile lettering and Braille. From character sizing and spacing to mounting height, pictograms, contrast, and installation, every detail plays a role in creating an accessible environment for everyone who enters a building.

While the requirements can seem overwhelming at first, understanding the fundamentals makes it much easier to deliver signage that meets federal standards and provides a better experience for building occupants.

Whether you’re managing a new construction project, renovating an existing facility, or fabricating signs for a client, investing in compliant ADA signage helps reduce liability, improve accessibility, and ensure long-term code compliance.

If you have questions about ADA sign specifications or need custom ADA-compliant signage for your next project, the team at Erie Custom Signs is here to help. With years of experience producing ADA signage for sign shops, contractors, architects, and facility managers nationwide, we can help you find the right solution while keeping your project on schedule and fully compliant. Contact us today to get started.