5 Tips for Applying ADA-Compliant Design Principles to Your Client’s Space

5 Tips for Applying ADA-Compliant Design Principles to Your Client’s Space

By Mike Shabluk | February 22, 2022

Why Accessibility Should Be a Priority for Interior Design

When you work in the interior design field, aesthetics are naturally a major focus. After all, your job is to help create spaces that are attractive, cohesive, and functional. But when you’re designing or remodeling a facility that’s open to the public, appearance is only part of the equation. Accessibility should be a priority as well.

ADA-compliant design is the practice of creating spaces that can be accessed and used by people with a wide range of abilities. By incorporating accessibility into your design process, you can help clients create environments that are welcoming, functional, and compliant with applicable regulations.

Ever since the Americans with Disabilities Act (ADA) went into effect in 1990, it has significantly influenced the way buildings throughout the United States are designed. Under Title III, public accommodations must provide equal access for individuals with disabilities. As a result, business owners have strong incentives to remain compliant and avoid potential legal and financial consequences.

For interior designers, a working knowledge of the 2010 ADA Standards for Accessible Design is essential. Understanding these requirements helps ensure that accessibility considerations are incorporated from the beginning of a project rather than addressed after the fact.

5 Tips for Applying ADA-Compliant Design Principles

For any project that involves modifying a public space, the goal is to create an environment that is not only visually appealing but also functional, safe, and accessible. Applying ADA-compliant design principles can help support equitable use while reducing unnecessary physical effort for building occupants.
Below are five practical ways to incorporate accessibility into your designs.

1) Be Mindful of Clearance Under Desks and Tables

Adequate clearance is a fundamental part of ADA-compliant design. When selecting new desks and tables for a client’s facility, make sure there is enough room underneath to comfortably accommodate wheelchair users without placing the work surface too high.
Without proper clearance, individuals who rely on mobility devices may have limited access to workstations, meeting spaces, reception counters, and other important areas.
According to ADA guidance, accessible tables should meet the following requirements:
  • Height between 28 and 34 inches
  • At least 27 inches of clearance between the floor and the bottom of the table
  • Knee clearance extending at least 19 inches underneath the table
Fortunately, there are many commercial furniture options available that meet these standards. Adjustable-height desks can also provide added flexibility, making them worth considering based on the client’s specific needs.

2) Aim for Hardware and Fixtures That Are Easy to Use

Hardware and fixtures are easy to overlook during a renovation project, yet they can have a significant impact on accessibility.
When sourcing products for a public space, prioritize options that can be operated with minimal effort and without requiring awkward hand or wrist movements.
Examples include:
  • Light switches: While traditional flip switches are generally acceptable, push-plate switches are often easier for a wider range of users.
  • Doorknobs: Avoid hardware that requires significant wrist twisting. Lever handles and U-shaped pulls are typically more accessible.
  • Faucets: Faucets should be operable with no more than five pounds of force. Touchless, lever-operated, and cross-handle options are commonly used.
  • Cabinet and drawer hardware: U-shaped pulls, levers, and push-type mechanisms can all improve usability.
Small hardware decisions can make a meaningful difference in the overall accessibility of a space.

3) Make Signage Part of the Overall Flow

Signage is an essential component of ADA-compliant design. Effective signs help visitors navigate a facility and access information more easily, including individuals with visual impairments.
As part of any renovation or design project, review existing signage and determine whether updates are needed.
Certain signs, including those identifying permanent rooms and common areas, must comply with ADA sign specifications. However, compliance does not mean sacrificing aesthetics. Designers have considerable flexibility when it comes to colors, materials, typography, and overall presentation.
In fact, ADA-compliant signage should support the flow of the space while complementing the surrounding environment. When chosen carefully, signs can enhance both accessibility and design consistency.

4) Choose Smooth, Non-Trip Floor Surfaces

Flooring plays a major role in how accessible a facility feels and functions.
A truly accessible environment allows individuals who use wheelchairs, walkers, and other mobility aids to move comfortably throughout the space. In most public environments, smooth and stable flooring materials such as wood, laminate, and vinyl provide the best experience.
Additional considerations include:
  • If carpet is necessary, choose a low-pile option that is easier to navigate.
  • Avoid overly soft flooring materials that may be difficult for mobility devices to move across.
  • Refrain from using plush or fringed area rugs in high-traffic areas where they may create trip hazards.
Selecting the right flooring can improve safety, navigation, and long-term usability.

5) Opt for Soft, Low-Glare Lighting

Lighting is another important element of accessible design.
Soft, low-glare lighting can make spaces more comfortable for individuals with low vision and can reduce eye strain for many occupants. Minimizing glare also helps improve visibility throughout the facility.
Although the ADA does not establish detailed lighting requirements beyond fixture placement, designers can still make thoughtful choices that support accessibility.
Common strategies include:
  • Installing low-glare lighting systems
  • Using adjustable lighting controls
  • Adding ground-track LED lighting in hallways and circulation paths
  • Designing spaces that provide consistent illumination without harsh contrasts
These considerations can make a facility easier to navigate while enhancing overall comfort.

Takeaway

Accessibility should be an integral part of any design project involving public spaces. By incorporating ADA-compliant design principles into furniture selection, hardware choices, signage planning, flooring specifications, and lighting design, you can help create environments that are both attractive and functional for a broader range of users.
As accessibility expectations continue to evolve, designers who prioritize inclusive design will be better positioned to deliver long-term value for their clients.
If your client needs updated signage as part of an accessibility initiative, explore our ADA-compliant interior sign packages. Designed to meet ADA requirements while supporting a cohesive visual environment, these solutions can be customized to fit a wide range of commercial, healthcare, educational, and government facilities.

FAQ

What is ADA-compliant design?

ADA-compliant design refers to designing spaces, products, and features that meet accessibility requirements established under the Americans with Disabilities Act and related accessibility standards.

What signs must be ADA compliant?

Signs that identify permanent rooms and spaces, such as restrooms, conference rooms, and stairwells, often must meet ADA signage requirements for tactile characters, braille, contrast, and placement.

What flooring is best for accessible public spaces?

Smooth, stable flooring materials such as vinyl, laminate, and wood are typically preferred because they are easier to navigate with wheelchairs and other mobility devices.

Does the ADA require specific lighting levels?

The ADA does not provide extensive lighting-level requirements. However, low-glare, evenly distributed lighting is generally recommended to improve accessibility and visibility.

ADA Sign-Making Tools: What You Need to Know

ADA Sign-Making Tools: What You Need to Know

By Mike Shabluk | July 23, 2024
Are you thinking about breaking into the ADA signage market? Offering ADA-compliant signs can help expand your capabilities, strengthen customer relationships, and create additional revenue opportunities for your shop.
However, producing ADA signage is not as straightforward as traditional sign fabrication. Along with understanding ADA requirements, you’ll need specialized ADA sign-making tools, equipment, materials, and production processes.
Before making that investment, it’s worth understanding what’s required, what it costs, and whether in-house fabrication makes sense for your business. Below, we’ve answered some common questions to help you evaluate your options.

What Makes ADA Sign Fabrication Different?

ADA sign fabrication is more complex than standard sign production because ADA-compliant signs must meet specific accessibility requirements.
For example, identification signs typically need features such as:

Easy Readability

ADA guidelines require tactile lettering to use easy-to-read sans serif fonts. Character size, spacing, and formatting are also regulated to ensure readability. Depending on whether the text is tactile or visual-only, requirements for uppercase and lowercase characters may differ.

Contrast

Room signs, directional signs, overhead signs, and other ADA signage must provide sufficient contrast between the characters and the background. While current standards do not specify an exact percentage, many industry professionals still recommend aiming for approximately 70% contrast.

Lack of Glare

ADA-compliant signs must have a non-glare finish. Both the background and characters should use matte or low-gloss finishes to support visibility and readability.

Braille

Braille has its own set of requirements, including dot size, height, spacing, and placement. For example, a minimum 3/8-inch clearance is required around Braille elements.
These are only a few of the requirements involved in ADA signage. There are many other ADA sign specifications that fabricators must follow. Because of this complexity, having the right ADA sign-making tools is essential for achieving both compliance and consistent quality.

Why Is It Important to Have the Right Tools?

The first step toward producing ADA-compliant signage is having the proper equipment. The fabrication process involves detailed, precision work that standard sign-making setups may not be designed to handle.
Investing in the right tools offers several advantages.

It Simplifies the Production Process

Specialized ADA signage equipment can help streamline fabrication, improve efficiency, and reduce manual labor. While every sign should still undergo quality control checks, the right tools help make production more predictable and consistent.

It Supports a Higher-Quality Finished Product

ADA signs don’t just need to meet regulations. They need to look professional and withstand daily use. Using the proper equipment and materials helps produce signs that are visually appealing, durable, and compliant.

It Helps Meet Customer Expectations

When customers order ADA signage, they expect a finished product that complies with accessibility requirements. Having the proper ADA sign-making tools demonstrates your ability to deliver reliable results and become a trusted resource for future projects.

What ADA Sign-Making Tools Are Needed?

If a sign shop plans to fabricate ADA signage in-house, it will typically need several pieces of specialized equipment.

Quick Answer: Most Common ADA Sign-Making Tools

  • CNC router
  • UV-LED printer
  • Paint booth
  • Commercial laminator
  • CO2 laser cutter
  • Engraver
  • Hot stamp machine
  • Design software
  • Raster® Braille licensing and equipment (if applicable)
Below is a closer look at each tool.

Router

CNC routers help sign professionals cut acrylic, aluminum, and other materials commonly used for ADA signage.
Because they are computer-controlled, CNC routers provide greater accuracy and repeatability than manual cutting methods. They also allow fabricators to create a variety of custom shapes and designs.

UV-LED Printer

UV-LED printers are widely used for direct-to-substrate printing.
Instead of printing graphics onto vinyl and applying them later, a UV printer applies graphics directly to the sign substrate. This can improve durability and reduce concerns about peeling or edge failure over time.

Paint Booth

Many sign shops have a dedicated finishing area, but a paint booth can significantly improve efficiency when producing ADA signage at scale.
A properly equipped paint booth allows for consistent color application and can make large production runs easier to manage.

Laminator

Commercial laminators provide an added layer of protection for printed graphics and text.
Lamination helps preserve appearance, improve durability, and extend the life of the finished sign.

CO2 Laser Cutter

CO2 laser cutters are a popular choice for ADA sign fabrication because they can process a wide variety of materials quickly and accurately.
Laser-cut components often have smoother, cleaner edges, which can reduce finishing time.

Hot Stamp Machine

Hot stamp machines are often used in photopolymer sign production.
They allow fabricators to add color and metallic finishes to raised graphics, enhancing the appearance of ADA signage while maintaining tactile functionality.

Engraver

Shops using the Raster® Braille method need a compatible engraving system.
Several CNC engraving systems support Raster® Braille production, with Vision being one of the more widely recognized options in the industry.

Additional Equipment

Beyond machinery, sign shops also need appropriate materials, software, and workflow systems.
For example, shops using the Raster® Braille method must also purchase and maintain the necessary licensing and production kits. As a result, bringing ADA fabrication in-house involves more than simply purchasing a few machines.

How Much Can You Expect to Spend on ADA Sign-Making Tools?

Equipment costs vary based on manufacturer, model, size, and production capabilities.
Typical investment ranges include:
  • UV printers: approximately $25,000 to $85,000
  • CO2 laser cutters: approximately $8,000 to $50,000
  • Commercial CNC routers: approximately $6,000 to $12,000
The equipment itself is only part of the investment.
Sign shops should also account for:
  • Employee training
  • Facility space requirements
  • Installation costs
  • Maintenance and repairs
  • Software licensing
  • Inventory and materials
When all costs are considered, many shops investing in full ADA sign fabrication capabilities can spend several hundred thousand dollars.

Can You Afford to Invest in ADA Sign-Making Tools?

For some sign shops, investing in every piece of ADA sign-making equipment makes sense. For others, the volume of ADA sign orders may not justify the expense.
Smaller sign companies often find it difficult to justify the costs of equipment, training, licensing, facility expansion, and ongoing maintenance when ADA signage represents only a portion of their business.
In those situations, partnering with a wholesale ADA sign manufacturer can be a more practical solution.
An experienced ADA signage partner already has the specialized equipment, processes, and compliance knowledge needed to produce finished signs. Outsourcing allows sign shops to offer ADA-compliant signage without making a significant capital investment.

Takeaway

ADA sign fabrication requires specialized equipment, technical knowledge, and a substantial investment in production capabilities. While some shops choose to bring the process in-house, others find greater value in partnering with an established ADA sign manufacturer.
If ADA signage demand doesn’t justify purchasing new equipment, outsourcing can provide a cost-effective way to expand your offerings while maintaining quality and compliance.
At Erie Custom Signs, we work with sign shops and trade professionals across the country to provide wholesale ADA signage backed by extensive fabrication experience. If you’re looking to offer ADA-compliant interior signage without investing in new production equipment, explore how we can help support your projects with dependable wholesale solutions.

Understanding Accessible Interior Design: Answers to FAQs

Understanding Accessible Interior Design: Answers to FAQs

By Mike Shabluk | June 6, 2023
As a commercial interior designer, you have a lot of factors to consider, including who will use the space. Along with your client’s budget, available square footage, and aesthetic goals, accessibility should be part of the planning process from the start.
People interact with buildings in different ways, and their abilities vary. A well-designed space should be functional, comfortable, and welcoming for everyone. That’s why understanding accessible interior design is so important.
If you’re looking to strengthen your knowledge of ADA interior design principles, you’re in the right place. Below, we’ve answered some of the most common questions about accessibility in interior design so you can create spaces that are both attractive and usable.
Let’s dive in…

What Is Accessible Interior Design?

Accessible interior design is the practice of creating physical spaces that are safe, comfortable, and functional for people with disabilities.
The goal is to ensure individuals can move through, understand, and use a space effectively. Whether you’re designing a single room or an entire facility, accessibility should help meet the needs of a wide range of users.
In many ways, accessible design requires designers to see a space from another person’s perspective. You need to consider the challenges someone with visual, mobility, hearing, or other impairments may face and avoid design choices that create barriers.

How Is It Different from Universal Design?

There is significant overlap between universal design and accessible design, which is why the two terms are often confused.
Both concepts aim to make spaces easier to use, but they’re not exactly the same.
  • Universal design focuses on creating environments that can be used by as many people as possible without requiring modifications or specialized accommodations.
  • Accessible interior design focuses specifically on ensuring people with disabilities can access and use a space effectively.
Put simply, universal design takes a broad approach to usability, while accessible design gives specific attention to the needs of individuals with disabilities.

What Is an Example of Accessibility in Interior Design?

If you walk through almost any public building, you’ll likely encounter accessibility features without even realizing it.
One of the most visible examples is ADA-compliant signage. Signs with tactile characters, braille, pictograms, and high-contrast text help people who are blind or visually impaired identify rooms and navigate a facility more independently.
Additional accessible design examples include:
  • Wide hallways and doorways
  • Multi-level countertops
  • Desks with additional knee clearance
  • Motion-activated sensors
  • Touchless faucets
  • Push-plate light switches
  • Ramps and accessible routes
These features help reduce barriers and improve usability for a broader range of building occupants.

Why Is Accessible Interior Design Important?

Accessible interior design helps ensure that people with disabilities can safely and comfortably use a space. Considering accessibility isn’t just good design practice, it’s also a practical business decision.
According to the CDC, approximately 12 million people age 40 and older in the United States have some form of vision impairment. Additionally, 11.1% of U.S. adults have a mobility disability. Chances are high that your clients’ employees, customers, patients, students, or visitors include people within these groups.
But that’s only part of the story.
Here are several reasons accessibility should be a priority in commercial interior design projects:

It’s a legal requirement.

Businesses that serve the public must comply with the Americans with Disabilities Act (ADA). This includes providing reasonable accommodations and incorporating accessibility features outlined in the 2010 ADA Standards for Accessible Design.
Accessibility requirements can affect signage, clearances, fixtures, routes, and other design elements. Failing to comply can result in substantial penalties.

It helps reduce legal risk.

In addition to regulatory penalties, businesses that fail to meet ADA requirements may face lawsuits from individuals who are denied equal access.
Beyond the financial impact, accessibility-related legal issues can damage an organization’s reputation and public image.

It creates a more welcoming environment.

Accessible spaces help everyone feel included.
When businesses invest in accessibility, they demonstrate consideration for customers, visitors, and employees with different needs. That commitment can positively influence both user experience and brand perception.

What Accessibility Best Practices to Keep in Mind

When designing a space, it’s important to follow both ADA Standards for Accessible Design and applicable International Building Code (IBC) requirements. Many technical accessibility requirements are addressed during architectural design and construction, but interior designers also play an important role.
Alongside established ADA-compliant design principles, keep these best practices in mind:

1. Think About Functionality

Accessibility begins with usability.
As you evaluate layouts, furnishings, and finishes, consider whether they could create challenges for people with disabilities. Clear pathways, appropriate furniture placement, and accessible work surfaces all contribute to a more functional environment.

2. Emphasize Safety

Safety should be a priority in every accessibility-focused design.
Potential hazards such as hanging fixtures, slippery flooring, or protruding objects should be addressed early. Choosing safer alternatives can help prevent accidents and improve navigation.

3. Design for Low Physical Effort

Spaces should be easy to use without requiring unnecessary strength, reach, or dexterity.
For example, high storage areas, difficult-to-operate hardware, or hard-to-reach controls may create barriers for some users. Thoughtful placement and product selection can make a significant difference.

4. Make Communication Easy

Communication is an often-overlooked aspect of accessibility.
ADA-compliant signage helps communicate critical information through tactile characters, braille, and visual contrast. Designers should also consider where visual and auditory cues can improve wayfinding and user understanding throughout a facility.

5. Aim for Smooth Transitions

Consistent and predictable transitions between spaces can improve accessibility.
Using similar flooring materials between connected spaces can help individuals with visual or mobility impairments move through a building more comfortably. Smooth transitions also contribute to a cleaner overall user experience.

Takeaway

Understanding accessible interior design can help you create spaces that serve more people while meeting applicable accessibility requirements. It also allows you to deliver greater value to clients by balancing aesthetics, functionality, and compliance.
By making accessibility part of your design process, you can create environments that are safer, easier to navigate, and more welcoming for everyone who uses them.
And when your project requires ADA-compliant signage, Erie Custom Signs is here as a trusted resource. We offer a wide range of customizable sign families designed to help architects, interior designers, contractors, and facility teams create cohesive, compliant interior environments.

An Overview of California ADA Signage Requirements

An Overview of California ADA Signage Requirements

By Mike Shabluk | February 27, 2024
There are many guidelines for designing, manufacturing, and mounting ADA signs. Businesses must comply with federal regulations as well as state and local requirements. For California-based facilities and the sign professionals who serve them, understanding California ADA restroom sign requirements is especially important.
The challenge is that California’s rules go beyond federal ADA standards. Fortunately, this overview breaks down the key requirements and explains how Title 24, AB 1732, and federal ADA regulations work together. With a solid understanding of these requirements, you can make informed signage decisions and help ensure compliance.

Why You Should Know California ADA Restroom Sign Requirements

Whether you’re purchasing signage for your own facility or sourcing signs for a client, understanding California ADA restroom sign requirements is critical.
Compliance issues can lead to costly corrections, legal disputes, project delays, and unhappy customers. A clear understanding of the rules makes compliance easier and helps reduce risk.
California has long maintained restroom signage requirements that are more specific than those found in many other states. As a result, facilities often need signage that satisfies both state and federal standards.
For California ADA signage, several regulations come into play:
  1. California AB 1732 (The Equal Restroom Access Act)
  2. Title 24 of the California Building Code
  3. 2010 ADA Standards for Accessible Design
However, compliance is about more than following regulations. These requirements help make facilities more accessible, intuitive, and welcoming for everyone who uses them.
The regulations themselves can be lengthy and complex, so facility owners, architects, contractors, and sign professionals are encouraged to review the official standards whenever possible. In the meantime, a practical overview can help clarify the basics.
Before diving into the specific restroom signage requirements, it helps to understand where these rules came from.

How Were California ADA Restroom Sign Requirements Created?

California restroom signage requirements actually predate the Americans with Disabilities Act.
The concept originated in the 1970s with inventor and mathematician Samuel Genensky. Having severe visual impairment himself, Genensky understood the difficulty many people experienced when trying to locate the correct restroom. He proposed using large geometric symbols that would be easier to identify visually and tactually.
His idea gained traction throughout California.
Women’s restrooms began using a 12-inch circle, while men’s restrooms were identified by a 12-inch equilateral triangle.
When the ADA was passed in 1990, federal restroom signage requirements were introduced nationwide. Rather than abandoning the symbols Californians had used for years, the state chose to retain them while also adopting federal ADA requirements.
As a result, California facilities must comply with both federal ADA standards and California-specific restroom signage regulations.

What Are the Requirements for Bathroom Signs in California?

At the federal level, the ADA generally requires one compliant sign to identify a public restroom.
In California, public restrooms typically require two signs:
  1. A geometric door sign that complies with California requirements.
  2. A tactile ADA wall sign that complies with federal requirements.
The California-required geometric symbols generally do not contain braille, text, or pictograms. Instead, they rely on shapes that have been familiar to California residents for decades.
Outside of California, these geometric restroom symbols are uncommon because most states rely solely on federal ADA signage standards.

Quick Compliance Summary

Most California public restrooms require:
  • A Title 24 geometric symbol mounted on the door
  • A tactile ADA sign with braille mounted on the adjacent wall
  • Proper mounting heights for both signs
  • Compliance with any applicable local code requirements

How Title 24 Guidelines Come into Play

California ADA restroom sign requirements are outlined within the California Building Standards Code.
Under Title 24, public restroom doors must display specific geometric symbols that meet the following requirements:
  • Men’s restrooms must display a 1/4-inch-thick equilateral triangle with 12-inch edges.
  • Women’s restrooms must display a 1/4-inch-thick circle with a 12-inch diameter.
  • The symbol must contrast with the color of the door.
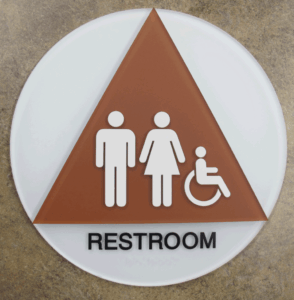
  • Unisex restrooms must display a triangle superimposed on a circle using contrasting colors.
  • Edges must be rounded, eased, or chamfered according to Title 24 specifications. Vertices must also meet the required radius dimensions.
A pictogram indicating restroom use may be included on the geometric sign. While tactile pictograms are not required, they are often incorporated into sign designs.

How AB 1732 Guidelines Come into Play

California Assembly Bill 1732, also known as the Equal Restroom Access Act, took effect in 2017.
The law was designed to improve access and reduce discrimination related to gender identity. Under AB 1732, all single-occupancy restrooms in public facilities must be identified as all-gender restrooms and be available to everyone.
As a result, signage requirements changed for these spaces.
For single-user restrooms:
  • The door sign must feature a 1/4-inch-thick equilateral triangle within a 1/4-inch-thick circle.
  • Mounting requirements remain consistent with other California restroom signs.
It’s also important to remember that local jurisdictions may enforce additional signage requirements. Always verify project-specific requirements with the appropriate authority having jurisdiction.

How Do California Requirements Differ from Federal Guidelines?

In simple terms, California requirements and federal ADA requirements govern different signage elements.
California regulations primarily address the geometric symbol displayed on the restroom door. Federal ADA regulations primarily address the tactile sign mounted adjacent to the restroom entrance.
Regardless of state-specific rules, all facilities must comply with federal ADA standards.
Federal ADA restroom signs typically require:
  • Tactile lettering that identifies restroom access
  • Grade 2 braille positioned beneath the tactile text
  • California-compliant braille spacing requirements where applicable
  • The International Symbol of Accessibility when identifying an accessible restroom
Installation requirements also differ.
Under federal ADA standards, restroom identification signs are typically mounted on the wall adjacent to the latch side of the door. The sign should be installed between 48 and 60 inches above the finished floor, measured to the baseline of the lowest braille cell.
California geometric restroom signs follow a separate standard.
The geometric symbol must be centered horizontally on the door and mounted between 58 and 60 inches above the finished floor, measured to the symbol’s centerline.
The same placement rules apply to the all-gender restroom symbols required under AB 1732.

When Can You Use a Dual-Purpose Restroom Sign?

Most California restrooms require both a geometric door sign and a tactile wall sign.
However, there are limited situations where a dual-purpose sign may be acceptable. For example, some restrooms with curved entrances instead of doors may allow a combined solution.
In other cases, all of the following conditions generally must be met:
  • The door cannot have a hold-open device.
  • The door must close automatically.
  • The sign must be installed on the push side of the door.
If these conditions are satisfied, a dual-purpose sign that complies with both state and federal requirements may be permitted.
Before proceeding, it is always wise to confirm approval with the local building official or authority having jurisdiction.

Takeaway

California restroom signage requirements combine state-specific rules with federal ADA standards. That means compliance involves more than selecting a standard ADA restroom sign.
Most facilities must provide both a California-compliant geometric door sign and a federally compliant tactile wall sign. In addition, projects may need to account for Title 24 requirements, AB 1732 all-gender restroom rules, mounting specifications, and local code requirements.
For sign shops, architects, contractors, and facility managers, understanding these standards early in the project can help prevent costly revisions and compliance concerns later.
If you’re sourcing restroom signage that meets California requirements, Erie Custom Signs offers a range of California restroom sign solutions designed to help trade professionals navigate these unique requirements with confidence.
Learn more about our California restroom sign options and find the right solution for your next project.

FAQ

Do California restrooms require two ADA signs?

In most cases, yes. California public restrooms typically require a geometric door sign that meets Title 24 requirements and a tactile wall sign that meets federal ADA requirements.

What symbol is required for a men’s restroom in California?

California Title 24 requires a 12-inch equilateral triangle that is 1/4 inch thick and contrasts with the door color.

What symbol is required for a women’s restroom in California?

Women’s restrooms require a 12-inch diameter circle that is 1/4 inch thick and contrasts with the door color.

What does AB 1732 require?

AB 1732 requires single-occupancy public restrooms to be identified as all-gender restrooms and accessible to all users.

Where should California restroom door signs be mounted?

Geometric restroom symbols must be centered horizontally on the door and mounted between 58 and 60 inches above the finished floor, measured to the centerline of the symbol.

An Overview of UV Direct Printing: The Benefits & More

An Overview of UV Direct Printing: The Benefits & More

By Mike Shabluk | January 24, 2023

What Is UV Direct Printing?

UV direct printing, also known as direct-to-substrate printing or UV flatbed printing, is a digital printing process that uses ultraviolet (UV) light to instantly cure specialty ink directly onto a material’s surface.
Because the ink cures immediately rather than soaking into the substrate, UV direct printing can produce sharper graphics, more vibrant colors, and greater durability than many traditional printing methods.
Today’s UV printing technology also incorporates layered-printing capabilities. Multiple passes of ink can be built up to create textured graphics, tactile characters, and even Grade 2 braille on compatible equipment.

How Does UV Direct Printing Work?

UV light is the key component behind the process.
UV direct printing uses specially formulated UV-LED inks that remain liquid until exposed to ultraviolet light. A direct-to-substrate UV printer deposits the ink onto the material while UV lamps mounted near the printhead immediately cure it.
As the printhead moves across the substrate, the UV light follows the ink application and triggers a chemical reaction that hardens the ink almost instantly. This allows the ink to remain on the surface rather than being absorbed into the material.
The result is a highly durable print with exceptional image quality and crisp text.
When producing tactile elements, the printer makes multiple passes, building layer upon layer of ink to create a raised, three-dimensional effect.

How Did It Originate?

Interestingly, UV curing technology was originally developed to quickly harden gel nail polish.
Over time, manufacturers in other industries recognized the potential benefits of instant-curing technology and adapted it for commercial printing, sign fabrication, and other specialty production applications.
Today, UV printing has become a preferred method for producing everything from branded displays to ADA-compliant signage.

What Tools and Materials Do You Need for UV Direct Printing?

Like any sign fabrication process, UV direct printing requires specialized equipment and materials.

Direct-to-Substrate UV Printer

The most important piece of equipment is the UV printer itself.
Printer capabilities vary significantly depending on the manufacturer, model, print area, and ink configuration. While premium equipment requires a larger investment, high-quality printers typically deliver better image quality, faster production speeds, and improved reliability.
For sign shops producing ADA signage, equipment capabilities are especially important.
Note: DCS and MUTOH offer patented technology that allows select printers to produce Grade 2 braille and ADA-compliant 1/32-inch raised characters using layered UV printing.

UV-LED Ink

UV printers require specially formulated UV-LED inks.
Selecting the correct ink is important because different substrates and applications often require different ink characteristics. For example, flexible materials may require more elastic ink formulations.
It’s also important to verify whether a printer supports white ink printing. White ink expands design capabilities and is often required for ADA signs and other specialty signage applications.

Material Substrate

One of the biggest advantages of UV direct printing is material versatility.
UV printing can be applied to a wide variety of substrates, including:
  • Acrylic
  • Laminate
  • Aluminum
  • PVC
  • Composite materials
  • And many others
This flexibility allows sign fabricators to meet a broad range of customer requirements without changing printing methods.

Design Software

Most sign shops already use design software to create sign layouts.
For UV printing workflows, it’s important to ensure that the design software integrates properly with the printer’s RIP software and production system. A compatible workflow helps reduce setup time and improves production efficiency.

What Are the Benefits of UV Direct Printing?

UV direct printing continues to grow in popularity because it offers advantages for both sign fabricators and their clients.

1. Quick Drying Time

Because UV ink cures instantly, it spends very little time interacting with the substrate.
This allows printing on a wider range of materials, including substrates that may be sensitive to heat or extended drying processes.

2. Sharp Graphics and Vibrant Color

Since the ink cures immediately, there is less opportunity for dot gain or ink spread.
The result is:
  • Sharper text
  • Improved detail
  • Better color saturation
  • More consistent print quality
Because the ink remains on the surface, graphics often appear more vivid than with traditional printing methods.

3. Increased Speed and Productivity

Immediate curing eliminates drying delays.
Combined with modern flatbed printer speeds, UV direct printing enables sign shops to produce more jobs in less time and improve turnaround capabilities for larger projects.

4. Lower Long-Term Production Costs

While the equipment investment can be substantial, the production process itself can reduce ongoing costs.
Because graphics are printed directly onto the substrate, fabricators often eliminate the need for:
  • Vinyl overlays
  • Additional laminates
  • Protective glass coverings
This can streamline production and reduce material expenses.

5. Flexible Finish Options

UV printing supports a variety of visual effects and finishes.
Depending on project requirements, fabricators can create:
  • Matte finishes
  • Satin finishes
  • High-gloss finishes
  • Layered texture effects
This versatility helps create signage that matches a client’s branding and environmental requirements.

6. Lower Energy Consumption

UV-LED printers typically consume less energy than many traditional curing systems.
Many models also utilize instant on/off LED technology, which can further improve energy efficiency during production.

7. Reduced Environmental Impact

Compared to some traditional printing processes, UV direct printing typically generates:
  • Fewer VOC emissions
  • Less heat
  • Reduced odor
As sustainability becomes increasingly important throughout the signage industry, these advantages can support greener manufacturing practices.

8. Additive Production Capabilities

Modern UV printing functions much like additive manufacturing.
Rather than removing material, printers build layers of ink on top of one another. This makes it possible to create:
  • Textured graphics
  • Raised tactile characters
  • Grade 2 braille
  • Decorative dimensional effects
For ADA signage manufacturers, this capability can significantly simplify production.

Is UV Direct Printing Durable?

Yes.
One of UV direct printing’s most significant advantages is durability.
Because the cured ink bonds directly to the substrate, the finished graphics generally offer strong scratch resistance and long-lasting performance. Signs are easier to handle, transport, and install without damaging the printed surface.
For ADA signage, durability is especially important. UV-printed tactile characters and braille created through layered ink construction are bonded directly to the substrate, helping reduce the risk of elements loosening or separating over time.
In high-traffic environments, UV-printed signs also tend to maintain their appearance longer and show less visible wear.

How Does UV Direct Printing Compare to Vinyl Printing?

Without direct printing capabilities, sign shops often print graphics onto vinyl and then apply the vinyl to a substrate.
When comparing UV printing vs. vinyl printing, UV direct printing offers several advantages:
UV Direct Printing Vinyl Printing
Prints directly on substrate Requires vinyl application
Faster production process Additional application step
Reduced risk of peeling Vinyl may peel over time
Sharper graphics and text Quality dependent on application
Lower long-term material usage Ongoing vinyl costs
For many sign fabrication applications, UV direct printing provides a more durable, efficient, and reliable solution.

Takeaway

UV direct printing has become one of the most valuable technologies in modern sign fabrication. Its ability to produce high-quality graphics directly on a wide range of substrates, combined with exceptional durability and ADA signage capabilities, makes it a strong alternative to traditional vinyl-based workflows.
For sign shops that have not invested in UV printing equipment, outsourcing can be a practical way to access the benefits of the technology without the expense of purchasing and maintaining specialized equipment.
At Erie Custom Signs, we utilize advanced UV printing technology, including equipment capable of producing ADA-compliant tactile characters and Grade 2 braille. If you need a trade-focused partner for ADA signage or specialty interior sign projects, our team is happy to help.
Request a quote to discuss your next signage project with an experienced ADA signage manufacturer.

CNC Routers: Their Use in Sign Manufacturing and More

CNC Routers: Their Use in Sign Manufacturing and More

By Mike Shabluk | February 12, 2019

What Are CNC Routers?

CNC (Computer Numerical Control) routers are automated cutting machines used to shape a variety of hard materials, including aluminum, wood, acrylic, fiberglass, and some steels. When paired with sign design and machine control software, they can produce precise cuts and complex shapes that would be difficult to achieve consistently by hand.

Quick Definition

A CNC router is a computer-controlled cutting machine that uses programmed instructions to accurately cut, carve, and shape materials for applications such as custom signs, architectural elements, industrial parts, and displays.

Parts

Several components work together to make a CNC router function effectively:
Spindle
The spindle is a high-speed rotary tool that holds the cutting bit. Different bits are selected depending on the material and desired finish.
Axis Movement System
The spindle moves along X and Y axes, allowing it to follow the programmed cutting path. Depending on the machine, movement may be driven by belts, gears, or other motion systems.
Bed
The bed is the flat work surface where materials are secured during machining. Proper material alignment is critical for accurate cuts.
Vacuum System
A vacuum nozzle attached near the spindle helps collect dust and debris, keeping the cutting area cleaner and improving visibility.
Computer and Control Software
The computer runs machine control software that converts design files into cutting instructions. The software directs the router’s movements and controls the machining process.

The Origins of CNC Routers

The roots of CNC technology go back further than many people realize.
Before CNC systems existed, numerical control (NC) machines were developed in the late 1940s by machinist and Parsons Corporation owner John T. Parsons. Working alongside the Massachusetts Institute of Technology (MIT), Parsons helped develop technology for the U.S. Air Force aimed at improving the efficiency of manufacturing complex aircraft components.
The first NC machines, introduced in the early 1950s, operated using punched tape. Within a few years, NC technology became widely adopted across manufacturing industries.
Computer-controlled machining evolved in the late 1960s, and during the following decade computer-aided machining systems became commercially available. By the late 1980s, CNC technology had largely replaced traditional NC equipment as the industry standard.
In recognition of their contributions, John T. Parsons and Frank L. Stulen received the National Medal of Technology and Innovation in 1985.

How Are CNC Routers Used in Sign Manufacturing?

While CNC routers are commonly used in woodworking, plastics fabrication, aerospace, and industrial manufacturing, they have become especially valuable within the sign industry.
Many custom signs require precise cuts, dimensional lettering, intricate logos, and complex shapes. Producing those components consistently and efficiently is often difficult without automated equipment.
That’s where CNC routing excels.

Typical CNC Routing Process for Sign Fabrication

Although the exact workflow varies depending on materials and equipment, a typical process includes:
  1. Set up the job using machine control software.
  2. Measure the material thickness and overall dimensions.
  3. Select the appropriate cutting bit.
  4. Secure the material to the router bed.
  5. Enter or verify material specifications within the software.
  6. Run the machining program and allow the router to perform the cuts.
  7. Use appropriate cooling methods when required by the material being processed.
  8. Inspect finished parts for rough edges and sand or finish them as needed.
The process may differ slightly when working with materials such as acrylic, metal composites, aluminum, or hardwoods, but the overall workflow remains largely the same.

When Should You Invest in a New CNC Router?

CNC routers are versatile tools, but they aren’t the right solution for every sign shop.
Before making a purchase, consider how often the machine will be used and whether it supports your most profitable product lines.
For example:
  • Shops producing large volumes of custom dimensional signs may benefit significantly from owning a CNC router.
  • Shops focused primarily on banners, decals, and flat printed graphics may find greater value in a high-quality direct-to-substrate printer.
  • Certain highly detailed projects may be better suited for technologies such as 3D printing.
A new CNC router may make sense when:
  • Custom fabricated signage is a core offering.
  • Existing equipment can no longer be repaired economically.
  • Outsourcing costs are becoming significant.
  • Production demand justifies bringing routing in-house.
Ultimately, the decision should be driven by expected return on investment and how the machine supports your shop’s long-term production strategy.

Takeaway

It’s easy to see why CNC routers remain a staple in the sign industry. They allow fabricators to produce precise, repeatable cuts across a wide range of materials while supporting the creation of custom and complex signage.
That said, owning a CNC router isn’t always the most practical option. Between equipment costs, software, operator training, maintenance, and replacement parts, the investment can be substantial.
For shops that don’t have consistent routing volume, outsourcing to an experienced fabrication partner can often be the more cost-effective solution. Doing so allows you to offer routed products to your customers without taking on the overhead associated with operating and maintaining a CNC system.
If you’re evaluating production options for a future project, working with a knowledgeable CNC routing partner can help you expand your capabilities while keeping costs aligned with demand.

FAQ

What is a CNC router used for in sign manufacturing?

CNC routers are used to cut, shape, and carve materials such as acrylic, aluminum, wood, and composite panels to produce custom signs, dimensional letters, logos, and other fabricated sign components.

What materials can a CNC router cut?

Depending on the machine and tooling, CNC routers can cut materials including acrylic, wood, fiberglass, aluminum, and certain steel applications.

How much does a CNC router cost?

CNC routers commonly range from approximately $5,000 to $50,000, with additional costs for software, training, installation, and shipping.

When should a sign shop buy a CNC router?

A CNC router may be a good investment when routing is a regular part of production, outsourcing costs are increasing, or existing equipment can no longer support production needs.

Is outsourcing CNC routing a good alternative?

For shops with lower routing volume, outsourcing can provide access to CNC fabrication capabilities without the expense of purchasing, operating, and maintaining a machine.

Understanding ADA Employer Obligations: How to Stay Compliant in the Workplace

Understanding ADA Employer Obligations: A Guide to Staying Compliant

Adhering to the Americans with Disabilities Act (ADA) is a crucial part of building an inclusive workplace. Today, accessibility is more than a regulatory requirement. It is an expectation shared by employees, customers, and stakeholders alike.
ADA employer obligations extend beyond avoiding discrimination. They include creating accessible hiring processes, providing reasonable accommodations, maintaining compliant facilities, and fostering a workplace culture that supports all individuals.
This guide outlines the key requirements employers should understand, along with common blind spots that can create compliance risks.

Core ADA Employer Requirements

Under the ADA, employers are responsible for several workplace practices designed to ensure equal access and opportunity.

1. Implement inclusive hiring practices

ADA Title, prohibit employers from using job standards or tests that unfairly screen out individuals with disabilities unless those standards are job-related and necessary for the position.
To support compliance:
  • Use accessible job descriptions and application materials.
  • Avoid questions about disabilities during the hiring process.
  • Ensure interview locations are accessible.
  • Verify that online application platforms work with screen readers and other assistive technologies.
These measures help create a level playing field while expanding access to qualified candidates.
Common blind spots: Many employers overlook the accessibility of online job applications. Forms that lack alternative text, proper navigation, or screen-reader compatibility can unintentionally exclude applicants with visual impairments. A digital process is not automatically an accessible one.

2. Offer reasonable accommodations that work

Title I also requires employers to provide reasonable accommodations for qualified employees and applicants unless doing so would create an undue hardship.
The accommodation process should be interactive and collaborative. Employers should:
  • Discuss needs directly with the employee.
  • Explore practical and cost-effective solutions.
  • Implement accommodations promptly.
  • Document requests, evaluations, and outcomes.
Reasonable accommodations may include flexible schedules, assistive technology, modified workstations, or adjustments to workplace policies.
Common blind spots: Employers sometimes focus on expensive solutions before considering simple adjustments such as schedule modifications or workstation changes. Another common issue is failing to revisit accommodations as job responsibilities or employee needs evolve.

3. Train your team to support ADA compliance

Managers, supervisors, HR professionals, and employees all play a role in maintaining an accessible workplace.
Regular ADA training should cover:
  • Disability awareness and inclusion
  • Accommodation procedures
  • Confidentiality requirements
  • Retaliation protections
  • Appropriate workplace communication
Well-trained teams are more likely to recognize accommodation requests, respond consistently, and contribute to a supportive work environment.
Common blind spots: Training programs often emphasize legal liability while overlooking everyday communication and empathy. Organizations may also skip refresher training, leaving employees unaware of updates or best practices.

4. Document compliance efforts and stay audit-ready

Proper documentation is one of the most important parts of ADA compliance. According to EEOC enforcement guidance, maintaining records helps demonstrate that employers fulfilled their responsibilities under Title I.
Documentation should include:
  • Accommodation requests
  • Interactive process discussions
  • Assessments and evaluations
  • Decisions and implementation details
  • Costs and undue hardship determinations, when applicable
Records should be securely stored with restricted access and retained according to applicable legal requirements.
Common blind spots: Some employers only document final decisions and fail to preserve the discussions leading to those outcomes. Others mistakenly store medical information within standard personnel files, potentially creating confidentiality concerns.

5. Design and maintain an accessible workspace

Physical accessibility is a key component of an inclusive workplace. While Title I covers workplace accommodations, Title III requires compliance with the ADA Standards for Accessible Design when facilities are altered.
Employers should regularly evaluate:
  • Entrances and exits
  • Hallways and pathways
  • Restrooms
  • Break rooms
  • Employee-only work areas
  • Shared equipment and workstations
Common improvements may include widening pathways, improving accessibility routes, installing ramps, or updating equipment to better accommodate employee needs.
For larger renovations or facility alterations, organizations should follow the 2010 ADA Standards for Accessible Design.
Common blind spots: Accessibility reviews often focus on public-facing areas while overlooking employee spaces such as storage rooms, workstations, or break areas. Temporary furniture changes can also introduce barriers that remain unnoticed.

6. Use ADA-compliant signage to ensure accessibility

Signage plays a critical role in helping individuals navigate a facility independently.
Under the 2010 ADA Standards for Accessible Design, many permanent room identification signs and directional signs must include:
  • Raised characters
  • Braille
  • Appropriate contrast
  • Non-glare finishes
  • Proper mounting heights, generally between 48 and 60 inches
Employers should verify that restrooms, conference rooms, exits, and other permanent spaces are clearly identified and compliant with ADA requirements.
Routine signage audits can help identify issues before they become accessibility barriers or compliance concerns.
Common blind spots: Organizations frequently replace signage without confirming braille accuracy, character height requirements, or contrast levels. Temporary event signage is another commonly overlooked area that can create accessibility challenges.

ADA Employer Obligations at a Glance

Employers should focus on six core areas of compliance:
  1. Inclusive hiring practices
  2. Reasonable accommodations
  3. Employee and management training
  4. Documentation and recordkeeping
  5. Accessible workplace design
  6. ADA-compliant signage
Addressing these areas proactively can reduce compliance risks while creating a workplace that is more accessible and welcoming for everyone.

Deliver Accessibility Beyond the Checklist

ADA compliance is about more than meeting minimum requirements. It is about creating environments where employees and visitors can navigate, communicate, and work with confidence.
For organizations evaluating facility accessibility, signage should be part of the conversation. Properly designed ADA signage supports compliance, improves wayfinding, and contributes to a more inclusive experience for everyone who uses the space.
Erie Custom Signs works with architects, contractors, healthcare facilities, educational institutions, and other organizations to provide ADA-compliant signage solutions that align with accessibility requirements and project goals. Whether you’re updating an existing facility or planning a new installation, having the right signage partner can help simplify the process and support long-term compliance.

FAQ

What are ADA employer obligations?

ADA employer obligations include providing equal employment opportunities, offering reasonable accommodations, maintaining accessible workplaces, preventing discrimination, and complying with applicable ADA standards.

What is considered a reasonable accommodation?

A reasonable accommodation is a workplace adjustment that helps a qualified individual with a disability perform essential job functions without causing undue hardship to the employer.

Do employers need ADA-compliant signage?

Yes. Many permanent room identification signs and accessibility-related signs must meet ADA requirements for braille, raised characters, contrast, and mounting height.

How often should employers review workplace accessibility?

Regular accessibility reviews are recommended, especially after renovations, workplace reconfigurations, policy updates, or major staffing changes.

How Do Blind People Get Around? Tools, Techniques, and Technology

How Do Blind People Get Around? Tools, Techniques, and Technology

By David Murphy | September 8, 2025

Getting from one place to another is something many people take for granted. For individuals with visual impairments or blindness, everyday mobility relies on a combination of skills, tools, training, and environmental cues that support safe, independent navigation.

How do blind people get around? Most rely on a combination of mobility aids such as white canes or guide dogs, orientation and mobility (O&M) training, and assistive technologies that provide audio, tactile, or location-based feedback. Accessible building design and ADA-compliant signage also play an important role in helping people navigate with confidence.

The World Health Organization (WHO) reports that more than 2.2 billion people worldwide experience some form of vision impairment, and at least 1 billion of these cases could have been prevented or remain untreated.
This growing public health concern highlights the importance of accessible design, inclusive technology, and greater public awareness. Business owners, contractors, and facility managers can make a meaningful difference by creating environments that support safe and independent movement.

4 Traditional Tools That Help Blind People Navigate

Many blind and visually impaired individuals depend on mobility tools that provide consistent, reliable support. These aids often form the foundation of safe and confident travel, especially in environments where advanced technology may not be available.

1. White Canes

The white cane is one of the most recognizable tools used by people who are blind. It acts as a tactile extension of the user’s senses, helping detect curbs, stairs, floor transitions, and obstacles through physical feedback.
Some modern white canes incorporate haptic feedback features that provide vibration alerts when terrain changes or obstacles are detected.

For businesses, signage should be installed at a height of 48-60 inches from the floor and include Grade 2 Braille, raised characters, and high-contrast, non-glare materials. These features are essential components of an accessible, ADA-compliant environment. 

2. Guide Dogs

Guide dogs are specially trained to help individuals who are blind avoid obstacles, follow routes, and navigate busy public spaces. Unlike a white cane, a guide dog can make real-time decisions that help its handler travel more safely.
To qualify, users typically complete training through a certified organization and learn how to work effectively with their guide dog. While guide dogs are not the right solution for everyone, they provide a high level of mobility and confidence for many users.
Facilities should also be guide-dog friendly. Keep walkways clear, avoid floor clutter, and never distract a working service animal. Clearly marked accessible entrances and assistance areas can improve the experience for guide dog users and visitors alike.

3. Orientation and Mobility Training (O&M)

Orientation and Mobility (O&M) training teaches individuals how to travel independently using sound, touch, environmental awareness, and mobility tools such as canes and GPS applications.
Offered through rehabilitation centers and trained instructors, O&M programs help people move safely both indoors and outdoors. Businesses can support these navigation strategies by maintaining consistent layouts, reducing unnecessary clutter, and using intuitive, ADA-compliant signage throughout a facility.

4. Sighted Guides

A sighted guide assists a blind individual by allowing them to lightly hold the guide’s arm while navigating unfamiliar or crowded environments, such as airports, hospitals, or large office buildings.
Although not every visitor will need a guide, many benefit from facilities that provide trained staff, designated assistance areas, and clear wayfinding signage.
Clearly marked assistance stations with tactile and Braille signage can make the experience smoother and more welcoming for visitors who rely on guided navigation.

5 Modern Technologies Transforming Mobility

Technology continues to expand how people who are blind navigate the world. These innovations complement traditional mobility tools and help users travel more confidently through complex environments.

1. GPS Navigation Apps with Audio Directions

Apps such as Soundscape and Lazarillo use voice prompts and spatial audio to help users identify landmarks and navigate outdoor environments.
While GPS technology is valuable outdoors, it does not replace effective indoor wayfinding. Accessible signs clearly identified entrances, and logical building layouts remain essential for successful navigation inside facilities.

2. Wearables and Smart Glasses That Detect Obstacles

Devices such as Envision Glasses and Sunu Band use cameras and sensors to identify objects, people, and obstacles. Users receive information through audio announcements or vibration feedback.
These technologies work best when paired with clear interior layouts and readable signage that help users understand their surroundings.

3. Voice Assistants for Hands-Free Assistance

Voice-enabled tools such as Siri, Google Assistant, and Alexa allow users to access information or request assistance hands-free. They can be especially useful in office settings, elevators, lobbies, and other public areas.
Businesses can improve usability by clearly identifying voice-enabled features and providing tactile instructions where appropriate.

4. Transit Apps With Real-Time Accessibility Data

Apps such as Moovit and Transit provide real-time transportation updates, including accessibility-focused features like voice guidance and route information.
These tools help visually impaired travelers make informed decisions when navigating public transportation systems and shared mobility options.

5. Bluetooth Beacons and Indoor Navigation Tools

Platforms such as NaviLens and Aira use smartphone-connected technology to provide location-based guidance within indoor environments, including airports, hospitals, shopping centers, and office buildings.
When combined with ADA-compliant signage, these systems create multiple layers of navigation support and can help improve accessibility in complex facilities.

4 Ways to Make Your Facility Accessibility-Friendly

Inclusive design helps people move through a space with confidence, dignity, and independence. The following improvements can make facilities more welcoming and easier to navigate for individuals with visual impairments.

1. Install ADA-Compliant Braille Signage

For someone who cannot rely on vision alone, well-designed tactile signage can provide critical navigation information.
ADA-compliant signs should include:
  • Grade 2 Braille
  • Raised characters
  • High-contrast, non-glare materials
  • Mounting heights of 48-60 inches from the floor
These features help visitors identify rooms, exits, restrooms, and services without assistance while supporting independent navigation throughout a facility.

2. Add Tactile Walking Surface Indicators (TWSI)

Tactile Walking Surface Indicators (TWSI) are textured floor surfaces that alert users to hazards, elevation changes, or directional shifts.
For people using white canes, these surfaces provide important tactile cues that improve orientation and safety. Consider installing them near entrances, stairways, ramps, escalators, and elevator banks.

3. Keep Walkways Wide and Clutter-Free

Many individuals with visual impairments use a technique called “shorelining,” which involves following walls or consistent edges while traveling.
Unexpected obstacles, temporary displays, or furniture placed in walking paths can disrupt navigation. Maintaining open pathways and consistent layouts helps create a safer, more predictable environment.

4. Partner With Erie Custom Signs

Accessibility goes beyond meeting minimum requirements. Effective signage should support independent navigation while aligning with your facility’s design standards.
Erie Custom Signs provides:
  • Grade 2 Braille and raised tactile characters
  • Custom design options and fast turnaround times
  • ADA-compliant signage solutions
  • Durable material selections
  • Expert support throughout the ordering process
From consultation to production, our team helps organizations create signage programs that meet ADA requirements while improving the experience of everyone who visits their facility.

Where Inclusion Meets Intention

For blind and visually impaired individuals, independence is influenced by the design of the spaces around them. Every decision, from installing tactile signage to maintaining clear walkways, can make a facility easier and safer to navigate.
When businesses invest in accessible design, they are doing more than meeting ADA requirements. They are creating environments that help all visitors move confidently and independently.
At Erie Custom Signs, we help architects, contractors, healthcare facilities, educational institutions, and businesses implement ADA-compliant signage solutions that support accessibility and wayfinding.
Ready to improve accessibility in your facility? Explore our ADA signage solutions and start building a more inclusive environment today.

Stadium Signage and Other Important Accessibility Features

Stadium Signage and Other Important Accessibility Features

By Mike Shabluk | December 11, 2018

The Importance of ADA Compliance for Stadiums

Under the Americans with Disabilities Act (ADA), businesses and public facilities are required to provide accessible environments for individuals with disabilities. This includes accommodations for people with mobility limitations, visual impairments, hearing loss, and other accessibility needs.
Few public venues serve as many visitors as stadiums. During football season alone, millions of fans attend professional, college, and local sporting events. Stadiums are also used for concerts, conventions, expos, and community gatherings throughout the year.
Because they welcome such large and diverse crowds, stadiums must pay close attention to ADA compliance. Accessibility is not only a legal requirement. It’s also an important part of creating a safe and inclusive experience for every visitor.
By meeting ADA requirements, stadium owners and facility managers can:
  1. Create a welcoming environment for all guests by ensuring everyone can enjoy the venue safely and comfortably.
  2. Reduce the risk of costly ADA-related fines and compliance issues.
  3. Minimize exposure to lawsuits and the negative publicity that often accompanies them.
  4. Expand access to more visitors by providing accessible seating, restrooms, parking, and navigation throughout the facility.
To achieve these benefits, it’s important to understand the accessibility features required in stadiums.

What Accessibility Features Are Needed at Stadiums?

Seating

Accessible seating is one of the most important ADA requirements for sports venues.
Key requirements include:
  • Wheelchair-accessible seating locations must be provided, with at least 1% of seats designated for wheelchair users.
  • Accessible seating must offer sightlines comparable to those available to other spectators.
  • Companion seating must be located adjacent to wheelchair-accessible seats.
  • In venues with more than 300 seats, wheelchair locations must be dispersed throughout seating sections.
  • Accessible seating must be connected by an accessible route leading from parking areas, transportation drop-off points, and other public spaces.

Restrooms

Every public and common-use restroom within a stadium must be accessible.
ADA-compliant restrooms should include:
  • Accessible toilet stalls
  • Adequate maneuvering space for wheelchair users
  • Proper sink heights and clearances
  • Accessible fixtures and accessories
Providing accessible restrooms throughout the facility helps ensure all guests can comfortably navigate the venue.

Parking & Drop-Off Areas

Accessible parking and passenger loading zones are critical to overall accessibility.
Requirements include:
  • Designated accessible parking spaces for both cars and vans
  • Accessible spaces located closest to accessible entrances
  • Curb ramps where drop-off areas are separated by curbs
These features help visitors reach the venue safely and efficiently.

Signage

ADA stadium signage plays a major role in helping visitors navigate the facility independently.
Depending on the sign’s purpose, ADA requirements may include:
  • Braille and raised characters on signs identifying restrooms, exits, and other permanent rooms or spaces
  • Readable text that can be understood by a wide range of users
  • Compliance with mounting-height, contrast, finish, and placement requirements for permanent room identification signs
  • Proper character size, finish, and contrast on directional and informational signs
Stadiums located in California may also be subject to additional signage regulations beyond federal ADA standards.
It’s important to note that these are only a few of the accessibility requirements that may apply. The ADA provides more comprehensive guidance for stadium design and accessibility compliance.

Quick Reference: Key ADA Accessibility Features for Stadiums

To help facility managers and project teams stay on track, stadiums should generally provide:
  • Accessible seating throughout the venue
  • Companion seating
  • Accessible restrooms
  • Accessible parking spaces and drop-off areas
  • ADA-compliant restroom and exit signage
  • Braille and tactile room identification signs
  • Accessible routes connecting all public areas

What Are the Potential Consequences of Noncompliance?

Without ADA-compliant stadium signage and other required accessibility features, stadium owners and operators may face significant legal, financial, and reputational risks.

Lawsuits

While ADA-related laws have evolved over the years, accessibility lawsuits remain common.
Addressing compliance issues during design, construction, or renovation is typically far less costly than responding to legal claims after a complaint has been filed. In addition to legal expenses, noncompliance may require extensive retrofits and facility modifications.

Fines

Noncompliance can also result in substantial financial penalties.
Under the rules established in 2014, the maximum penalty for a first-offense Title III violation was $75,000, while a second violation could result in penalties of up to $150,000.
For stadiums and large public venues, even a single compliance issue can become expensive if left unresolved.

Loss of Status

Accessibility issues can negatively impact a stadium’s reputation among visitors, event organizers, and governing organizations.
Failure to meet accessibility requirements may also affect a venue’s eligibility to host major events that require compliance with applicable laws and facility standards.

Takeaway

Stadiums are designed to accommodate large crowds, which makes accessibility planning especially important. From seating and restrooms to parking areas and ADA-compliant stadium signage, every element plays a role in creating an inclusive experience for visitors.
Whether you’re involved in new construction, a renovation project, or a signage package upgrade, understanding applicable federal and state accessibility requirements can help avoid costly mistakes and improve the overall user experience.
For sign professionals, architects, contractors, and facility managers, ADA signage should be treated as a critical part of any stadium accessibility strategy rather than an afterthought.

Need ADA-Compliant Signage for a Stadium or Large Public Venue?

Erie Custom Signs works with sign companies, contractors, architects, and facility teams to provide ADA-compliant signage solutions for projects of all sizes. If you’re planning a stadium, arena, or public-facility signage package, partnering with an experienced wholesale ADA signage manufacturer can help simplify the compliance process.

FAQ

Are stadiums required to have ADA-compliant signage?

Yes. Permanent room identification signs, including many restroom and exit signs, must meet ADA requirements for tactile characters, Braille, placement, and other accessibility standards.

What ADA signage is required in a stadium?

Required signage may include restroom signs, exit signs, room identification signs, and other permanent space markers that comply with ADA design standards.

How many wheelchair-accessible seats must a stadium provide?

ADA requirements generally require at least 1% of seating locations to be wheelchair accessible, along with companion seating.

Why is ADA compliance important for stadiums?

ADA compliance helps provide equal access to visitors, reduces legal risk, supports visitor safety, and contributes to a positive guest experience.